Sunday, October 28, 2007

Freeware Software Finds Linkfest

Here is a collection of fine software I've wanted to highlight this month.

I've been running out of time, so feel free to browse the racks at your leisure (just not while in a leisure suit).

Nothing is tagged with electronic or ink-blister inventory-control devices.  So if you see anything you want, don't rush out the door.

Best Find-O-October Department:

Dial-a-fix - "Damn I wish I knew of this sooner."  This clever little utility is a collection of scripted fixes for common and frustrating Windows system issues.  It may be able to repair Windows Update errors and Automatic Update problems, MSI issues, SSL, HTTPS, and cryptography service issues, COM/ActiveX issues, missing registry entries, and quite a few more problems as well.

Graphical Goodies:

Poster Forge - Freeware utility to create your own posters (motivational, inspirational, demotivational, film/movie, old-West, and more).  I can see hundred's of uses for this around work.

3D Box Shot Maker - Want to make a virtual store-shelf product box image? This is your tool.  Take a graphic image and it can be edited, morphed, and cleaned up to a great 3d-style box image.  Really cool and neat. Includes shadows and reflection effects.

Rumshot - Create framed screenshot captures in a variety of frames.  Nice and easy to use program.

Updated Fall Classics:

KeePass Password Safe v1.09  - This perennial password manager favorite o-mine has now been updated.  I really like what it delivers. There is also an alpha-version release 2.03 out for the brave.

Process Explorer v11.03 - Microsoft's Sysinternals tool has been tweaked yet again for improved performance and loads of Vista support fine-tuning.

The PC Decrapifier v1.8.6  -  This handy-dandy tool removes a number of programs commonly installed on many "out-of-the-box" new computer systems.  If you like a plain-system, this tool can save you loads of time instead of manually uninstalling each of the elements one-by-one yourself.

DupKiller v0.8.2 - While I don't normally worry too much about having duplicate files on my 500 GB hard drive, having the ability to quickly and rapidly locate any duplicates is a great thing. DupKiller is one of the fastest utilities I have ever found just for this purpose.

OrphansRemover v1.8.9 - OK. It hasn't been updated since Feb 2006, but it is still a dead-handy tool for scanning your system for "orphaned" shortcut files. I just couldn't leave it out.

AM-DeadLink v3.1 - Well, it was updated to me.  This version supports Windows Vista.  AM-DeadLink quickly scans your bookmarks in Opera, IE, Firefox, and Mozilla/Netscape browsers and looks for invalid links.  You can also use it to download "FavIcons" for Opera, IE, and Firefox.  If you have dead-links, you can remove them and resave your updated bookmark file.  Lots of options and default setting adjustments.  It ripped through my Firefox collection of over 800 bookmark entries in just over a minute's time.

For the Impulsive:

Microsoft Works Converter - Via Lifehacker, this Microsoft utility allows you to open, edit and save those documents you made in Microsoft Works into Office 2003 or Office 2007. This newer version now supports Microsoft Works version 6, 7, 8, and 9 file formats.

Resizeable Form Fields :: Firefox Add-ons - Are you like me and hate being forced to accept web-form-fields that are just too small to be comfortable?  This is Firefox add-on for us!  Allows you to resize (most) form-field boxes to your tastes.

The Man in Blue > FormTextResizer - Don't want to go with a "add-on"?  OK.  Try this bookmarklet version instead.

Come back soon.

--Claus

Freeware Software Uninstallers

OK.

So I might be remiss if I just got done posting utilities to help you keep your installed applications up-to-date if I didn't quickly mention some freeware utilities to help remove installed applications from your system as well.

Sure, you can use the "Add/Remove Programs" list in your Windows Control Panel, but it is sometimes slow to build the list and frequently doesn't display all the applications it really could.

That's why a third-party uninstaller program could be quite handy to have. Not only do all of them allow you to quickly uninstall a program, many also provide you the ability to remove a "broken" item from the list, and quite a few provide incredible detail about the installed application itself.  If you haven't ever used anything else besides the default Windows add/remove tool, you don't know what you are missing.

Here are the freeware uninstall tools I use, in order of preference...

  1. MyUninstaller - Nirsoft's tiny little application quickly scans your system for applications eligible for un-installation.  What really makes it useful is not only does it list the application, but it also provides version number, company name, description (if available), installation path, web-site, installation date, uninstall string, registry key, root key, and the installer software type.  Even if you aren't going to actually uninstall an application, it is great for getting information and doing research on what you do have installed on a given system. You can generate a report. And there are a wealth of "advanced" features for power-uninstallers. USB Portable. 

  2. Free Uninstaller 1.1 - Jacek Pazera's application has really taken me by surprise. Like Nirsoft's above, it provides a great amount of detailed information on each installed application.  In addition, you can run instant web-searches using one of three web-search engines on any item listed if more research is desired. It is very fast.  The interface is very modern but friendly and has a dual-pane view.  You can set a number of program options.  It lists "visible" entries, "invalid" entry items, as well as "system components".  I really like this utility and it may soon become my number-one choice.  USB Portable.

  3. Uninstall Tool (v1.6.6) - This was previously my #1 uninstaller pick.  It was fast, simple and did the job. Besides the normal "uninstall" support, the right-click feature allowed me to view the installed program folder, registry entry, or even the website if available. If you have an entry listed but it is incorrect, you can delete the item from the add/remove list without actually uninstalling the (non-existent) product.  While not something most users would be advised to try, it is great for pros who are cleaning house.  The latest version (v2.2.1) is much more feature-rich, but is no longer freeware. Version 1.6.6 is USB Portable.

  4. Revo Uninstaller - Really an "advanced" uninstall tool. Not only does it allow speedy cataloging and uninstallation of applications, it brings with it some power-tools for system maintenance; an auto-run viewer/editor, quick links to common Windows system tools, MS Office and web-browser cleaners, junk-files (temp) cleaner, and some secure-delete tools.  It also has a "hunter-mode" utility to uninstall, stop, or delete applications using a GUI interface...basically drag-n-drop.  Nice interface and pretty easy to use. USB Portable.

  5. EasyCleaner - ToniArt's wonderful tool. Another "swiss-army knife" utility.  Besides providing uninstall support, it also can scan the Windows registry for invalid entries for removal (be careful!), look for duplicate files, look for unnecessary files, clean invalid shortcuts, display space usage, display startup items, clean IE temp files, cookies, and history, clear the most recently used lists on the Windows system.  USB Portable

  6. Safarp - Small and Fast Add/Remove Programs.  It is pretty small. It is definitely fast..maybe the fastest here.  It doesn't provide all the bells and whistles of the other programs, nor the amount of details of each installed program.  What it does do is quickly list programs you can uninstall/repair and lets you pick what you want to do. Simple and pleasant interface. USB Portable.

Claus

Maintaining Application Updates

Lavie and I purchased our first home pc back in the mid 90's.

We picked up a Gateway tower unit.  It was really fun selecting our choices of memory, processor, drive, software options.

Whoppin Windows 98.

Heady stuff.

One of the applications that came with it was called Oil Change.

It promised to help keep installed software up-to-date by running periodic scans and queries. I used it once or twice but that was it.

Today I keep really close tabs on the operating system updates and patches, along with my web-browsers and security software.  But to be honest, most other software updating takes a back seat.

I wouldn't say I have a "lot" of software installed on my systems, but certainly much more that would be easy to keep up with.

With the exception of DAT (signature) files for anti-virus and anti-malware I generally don't keep a close on versions.  If an application I have installed is running fine and stable, and a newer version doesn't really have any remarkable enhancement over a previous one, I usually remain happy with the status-quo.

I have recently been experimenting with several new freeware applications that promise to help with the task of monitoring your software for updated versions.

Here's what I think, in order of preference:

Free Software Updating Offerings

  1. Microsoft Windows Update - If you are a Windows system user, you MUST make this your number one stop for critical updates.  Check for "Recommended" and "Driver" updates as well from time to time.

  2. Microsoft Office Online - Stop two.  Since we run Microsoft Office, we also must make sure that our Office software is fully patched and updated to avoid exploits.  This is something that many users (home and work) frequently forget to do.

  3. Software Inspector - Secunia - This free on-line scan service fro Secunia checks your Windows system for insecure versions of common software applications.  It can run under Internet Explorer, Opera, or Firefox as long as you have a recent Java installation.  I really, really, really like this service.  It is fast and provides wonderful feedback on insecure findings, offering you information on the vulnerable version as well as (often) links to the latest update. You can perform a "fast" scan or a "full" scan which will look for software installed in "non-standard" locations on your drives.

  4. Personal Software Inspector (PSI) - Secunia - This is a localized version of Secunia's Software Inspector.  Though still in beta-status, it is pretty spectacular and has a number of things going for it.
    1. Secunia claims it scans for over 4,700 software applications,
    2. It identifies insecure versions,
    3. It identifies End-of-Life software versions,
    4. It provides direct-download links to software updates and patches,
    5. It runs in the background, monitoring your system constantly,
    6. You can set the options to skip certain drives or folders if you keep archived older-versions present.
    7. Clicking on any item identified provides a wealth of information on the reason for the alert, including a summary, solution, any installation deviation information, your installation path, and reference links.

  5. filehippo.com Update Checker - FileHippo is one of my most trusted sources for good, quality freeware/shareware applications.  They don't have everything, but what they do offer is high-quality and pretty mainstream software applications.  Download their update-checker which is a single exe file.  When run (requires .NET 2.0) it opens a web-page that will list any newer version updates to software they offer found installed on your system.  They also can provide beta-updates as well.  It is fast and works well for me because since I use many of the applications from this site, I get good match coverage.

  6. AppGet - Download the tool and install.  Once ran, it scans your system for installed versions.  Then hit the "synchronize" button to check your list against that maintained by the AppGet server.  On my system it found 78 applications and 29 that needed updates.  Of those, many were actually "beta" versions, so again, be careful.  It did run very fast and provides a clear link URL to view as to the source location of the file you are downloading (if available). It is community supported so it is only as good as those that contribute and participate.

  7. UpdateStar - This freeware utility is a relatively new kid on the block. It claims to support over 80,000 products. The interface is pretty Web 2.0, but is simple to use.  Here's the thing; like AppGet, it is supported by the community of users.  Right now it says I have 73 matching applications, of those, 4 are out of date and need to be updated.  Two entries report the application Eraser with my installed version as 5.7 (it is the current one) but it claims the current version is 5.84. Same with AVG Free. It says the current version is 7.5 and isn't picking up my 7.5.488.1157 version correctly.  Also, 27 applications it found installed, it doesn't have a corresponding version to offer, me.  Which gets back to the heart of the matter. If you want it to be accurate, you need to participate in the community.  So for any mis-matches, or non-matches, you really would need to do some homework, click the "submit-update" button on each one, enter in the web-form the correct version information, update links, etc and then submit it up to Update Star staff for them to authenticate and repost to an updated database.  The other issue is that you need to check the linkage for the "downloads" pretty careful.  I can hope that they are correct and not pointing to false locations, but for example, on my system, Update Star is pointing to a "S & S Royal Limited" for the latest versions of Eraser not Heidi Computer's Limited.  So while Update Star shows some nice promise, I wouldn't depend on it quite yet as an authoritative source.  Might be good for quick research, then track out on your own to confirm each finding.

  8. AppSnap - This is a clever little tool.  Once ran, it provides a list of popular software applications.  You can select the ones you are interested in, download them, and install them.  There is a little drop-down combo box at the top to display by a certain category.  If you are looking for updated versions, pick the "upgradeable" option.  On my system it only found one match that could be upgraded (EverNote) out of a total of seven applications I have installed that also match it's offerings.  It is a nice tool and useful, assuming you have at least one application installed that matches its database.  I rather like the plain interface.

  9. VersionTracker (website) - this website lists updated versions of many, many applications. The thing is you need to know what you already have installed and then monitor the site frequently.  Registered users get some more bells and whistles.

  10. RSS Feeds - There are a handful of software providers that provide very high-quality software utilities that I depend on (NirSoft and Sysinternals).   To stay up-to-date on these sources, I have subscribed to their RSS feed lists.  Many (though not all) software vendors or download sites have RSS feeds to provide their fans updates.  By monitoring these you can stay up to date on updates!

  11. Honorable Mentions: win-get Repository and Appupdater worth looking into, but not for the average home user.  You need to be comfortable with the command-line for these beauties.

Regardless of the method, find at least a few locations and tools here and use them to periodically assess your software situation.  Keep you Windows system up to date with the latest Microsoft patches and at least run Secunia's on-line Inspector from time to time.  This should at the very least help keep your system free from vulnerable versions of common applications.  Then play with the others as well and see if you might find them useful for keeping an eye out for your other applications.

Claus

Friday, October 19, 2007

Comcast Mysteries: Am I a spambot ? & SMTP Port 25 or 587?

I've been a bit "miffed" lately.

A few nights ago Lavie couldn't find a few of her favorite cable channels. And a few others had gone "static" as well. We program our favorites into the TV's so we can skip the ones we don't watch, so by going though them manually, we figured out where they went and suspected a channel lineup change. This was later confirmed in the local paper.

So it was time to do some reprogramming of the televisions and recording units.

Then we got this mysterious email...

Assessing Abuse-garee

I'll spare you the details but it began a bit suspiciously on several levels.

Dear Comcast High-Speed Internet Customer,

Please read this entire message, review the required action(s) below,
and send a prompt reply message to acknowledge receipt of this email.

Explanation:

We have confirmed that your computer has been involved in attempted
virus propagation, an activity that is in violation of the Comcast Terms
of Service Agreement. The reporting parties have provided logged
information, which identifies the IP address of the computer that was
attempting to transmit the virus. The IP address listed was one that was
assigned to your computer at the date and time in question.
Also were a number of moderately-helpful generic suggestions on how my system may have become infected, mediation steps, and some "helpful" html-weblinks.

Since I have been on the record before about being suspicious about similar emails (Phish bait) I did some checking first before getting into a panic and responding.First I checked the HTML link code. They all seemed legit and did point back to legitimate Comcast website addresses.

Then I checked the IP address of the sender. It was in the range of Comcast owned addresses based on AIRN WHOIS. OK. So far so good. I then did a Google search on abuse-garee and found a handful of hits, including this one that was very helpful: Linux Home Automation - Comcast mail rant!So by now I was pretty comfortable believing that the email was legitimate from Comcast.

Am I compromised?

So, while I didn't think any of my systems were compromised I had to re-verify their status, just for my own personal peace-of-mind.

Alvis's Linux box hasn't been on for weeks, so I quickly discounted that one. How do I know? The pile of teen-detritus on top of her keyboard and blocking her pc cabinet door hasn't moved in that time. Besides, it's Linux. That's kinda like baiting an Apple user and telling them their pc is a virus-factory. Pick a fight elsewhere. You'll generally loose.So that left me a Vista system and two XP Home SP2 systems.

While I doubted I'd find anything, It is important to objectively verify or discount all potential reports of security breaches. My systems are all fully patched and up to date. I run a variety of security applications as well as a firewall (inbound/outbound monitoring), and a hardware-based firewall/router. We don't have a wireless network that someone could have hacked.I went through each system running full system hard-drive scans using AVG Free. Then I went through them and did full-drive scans using a series (four) of my favorite anti-malware scanners. I did rootkit scans. All came back clean. I ran a tool that monitored all my network connections looking for any unexpected findings. All were normal. I finally checked all my autorun entries as well as the running system processes. Nothing out of the ordinary.

So after a lot of work, I was left with two possible conclusions...one of my systems was so compromised that I couldn't even find evidence...and maybe should do complete reformats of every one...or Comcast made a mistake.

Re-View

The automated email that I got from Comcast's abuse-garee wasn't very helpful on the surface. It did appear to be focused on virus propagation activity. As far as I could technically tell I had ruled out that being the case...unless it was an as-yet-unknown variety. Certainly possible.To the best of my knowledge Comcast's cable modems use dynamic IP addresses, so it might be possible that my IP address had been updated recently and now I was assigned one from a previous user that had been infected, and thusly, tag-I'm-it.

Comcast's email was clearly a canned response likely geared to average (non-technical) users.It did not contain any time/date event log information.

It did not contain any information about the file or attachment that was being propagated.I have never received one previously from Comcast, so it didn't seem like the problem (if accurate) had been occurring until just very recently.

It didn't contain information as to the destination(s) of the propagation techniques.Any one of those elements might have been helpful to me.

Just about the only clue I had to go on, was that this "event" appeared to have been reported to Comcast by an outside party...but again, no name or clues for follow-up.

Lavie's Lead

So today, while I was recovering at home from a stomach-bug and Lavie was nursing me to health, she mentioned she was having a problem with her laptop.Turns out she had forwarded several email the other day to me (at work) as well as to her Gmail account from our desktop pc.

Her laptop has Thunderbird configured to pull mail from her Gmail account but although I got them at work, she never got them through her Gmail account and back to her Thunderbird client.I asked her if she had logged in to Gmail, not via Thunderbird client, but directly into the web page. She said she hadn't as she forgot her password and it never made it into our KeePass Password Safe keeper application.

I went to her laptop and pulled Thunderbird up and went into something like Tools --> Options --> Security --> View Saved Passwords. Then in the Password Manager, clicked "Show Passwords."With that information in hand, I logged into Lavie's Gmail account on the web.

None of her emails were in the main window, so I checked under "Spam" and.....There they all were.

We tagged them as "Not Spam" and then sent an email back to our comcast.net account to ensure that email address was in the Gmail contacts and wouldn't be tagged again.

What do you think?

Do you think that Gmail's spam-filtering machine send an automated spam-abuse alert back to Comcast? That would have contained our IP address in the sender's field, and since Lavie forwarded multiple emails at about the same time, it surely could have triggered a "spam-bot" tripwire in Gmail.

The emails were all sent shortly before we got the Comcast warning email. So that fits as well.I also sent one from our desktop account to my own Gmail address and somehow it also ended up in my own Gmail spam folder. Interesting. I had sent emails this way before, but I went ahead and sent one back to ensure it was also in my own Gmail contact list.

Per Comcast's abuse-garee request, I did reply to the original email I got confirming its receipt, as well as outlining my issues with the lack of detail they provided, assurances that my systems appeared clean, requesting more information on the reported event, and my findings above that I suspected triggered the alert in the first place.I'll let you know if I hear anything back.

Which then led me to this...

Bonus: Which SMTP port do you want me to use, Comcast?

Of interest, we are using port 25 for our Outgoing email server setting to send desktop account email to Comcast. Is and has been working just fine.I got that value when we transitioned over from TimeWarner Roadrunner's settings using the following guides from Comcast.

How do I setup Thunderbird for E-mail? - Comcast FAQ's

How to verify Thunderbird settings - Comcast FAQ's. Note in this one, the last screen-shot clearly shows the outgoing mail server stmp server port set as "25"

However, based on this post I mentioned, it seems that Comcast really wants Thunderbird users to use port 587 instead.How to configure Thunderbird to use port 587 for sending e-mail - Comcast FAQ's

This MozillaZine article has a bit more info: Creating accounts in Thunderbird for popular email providers ...

Comcast documents two SMTP configurations, a unsecure connection using port 25 and a secure connection using "TLS if available" and port 587. If you get a error message that the SMTP server may be unavailable or refusing SMTP connections there is a undocumented configuration that several users have gotten to work. Use port 465 , set "use secure connection" to SSL, check the authentication required box and provide your full Comcast address as the username.

I haven't changed it yet, but might just do so if I hear back from Comcast. Funny they didn't specifically ask me to do so...

Looks like a few other Comcast folk have tripped over this:

Comcast Blocking Port 25? ~ usrbingeek’s musings

port 587 - CNET Mac software ForumsPort Of Call And Other Outlook Adventures ~ IT Professionals

"Does my ISP block port 25?" - DreamHost Knowledge Base

With resepct to Mr. Ollivander, "Curious...very curious..."

--Claus

Update..Lavie forwarded another few to her Gmail account and we got a fresh warning message from Comcast. These didn't end up in her Gmail spam pile. I'm thinking Comcast itself is scanning the messages (content/header/subject...who knows) and giving the alert message. I'm going to swap over to the other port this weekend and see what happens.

Monday, October 15, 2007

heise Offline Update 4.0 - Now Serving Vista and Office users!

I've mentioned here (once or twice) the fantastic Windows update tool from heise: Offline Update.

I can't imagine a Windows tech-support shop (hobby or enterprise) that hasn't at least kept a copy of this tool in reserve.

Home users even can benefit.  It's great for fully patching a Windows system without having to connect the computer to the network/Internet to obtain the critical update patches.  This helps ensure that the operating system is as locked down and secure as possible before networking it.  The drawback it that (in the past) you either had to download and keep up with the patches manually one at a time, and install them one at a time, or take your chances and download them from the net(work) with the time associated with that process.  And if you were setting up a new system for a dial-up user...get out the cooler and kick back...you will be sitting there a long, long, time.

Autopatcher...Down but not Out

Previously users might turn to AutoPatcher for an all-rolled-into-one patching solution. It worked great and had a big following. Unfortunately, Microsoft decided they didn't like the model and had to shut down their project in it's current build.  Good news is that Antonis is hard at work making a new version that will hopefully pass Microsoft's smell-test.

heise Offline Update Script

heise Security's Offline Update script does some amazing things.  First you just download and install the latest build version. Then unpack it to any location you wish on your drive.  Run the executable and select which platform(s) and localized language(s) you want to create.  Then decide and select if you want an individual media ISO for each build or a combined platform ISO.

A WGET window opens and the scripts download the latest update catalogs directly from Microsoft's update servers. Then it downloads (again from Microsoft's update servers) the updates needed.  When done it rolls them up in an ISO file ready for burning to disk media with an updater kickoff exe file.  I just unpack the ISO with ISOBuster and put the files directly on a portable USB drive and use that instead.

When it is time to update a system, pull out your current disk/USB media, pop-it-in and update away...no network connection required!

An auto-run kicks in and the apply update window appears. Select your options as appropriate and let-her-rip.  The script then compares it's update catalog list against the updates currently listed on the local system catalog and then proceeds to apply only those updates (automatically) needed to bring the computer current.

Next time you run the "master" updater again, WGET again gets the latest catalog, compares what it finds against what has already been previously downloaded, and only downloads the new ones or patches that have been updated to a newer version.  Then creates a fresh ISO file.

Version 3.2 supported updates for Windows 2000, 2003 Server, and XP (all versions).

Easy-Peasy!

heise Offline Update Script 4.0

With version 4.0 the folks at heise have simply outdone themselves.

They have included Vista System update patches in the list of supported operating systems and have added support for individual support packages for Office 2000, Office XP, Office 2003, and Office 2007!

Check out all these new features!

  • New: Support added for Microsoft Windows Vista
  • New: Support added for Microsoft Office 2000, XP, 2003 and 2007
  • New: Updates which are not listed in wsusscn2.cab any longer will be removed automatically
  • New: Service Packs (statically defined updates) may be excluded from download
  • New: CopyToTarget.cmd added to ease USB device preparation
  • New: Generator and Installer GUIs will be displayed in German on German systems.

I tested the new builds on a freshly (ImageX'ed) XP Pro SP-2 with Office 2003 system.

Before using, I ran an on-line Windows Update check and found the system needed 22 Critical Windows updates for the system and needed 2 office 2003 patches (SP3 and Outlook junk mail filter update).  I did not apply these but just use this to "baseline" the patch status.

Note: I could have also used the Microsoft Baseline Security Analyzer (MBSA) to test the before/after patching state as well.  MBSA 2.1 (beta) now also supports Vista platforms.

Next I ran the XP patch updater installer and it quickly performed the updates "off-line."  I rebooted the system and went back and checked "on-line" how many patches were applied.

Result? All of them. No updates were missed.

Then I tried the Office 2003 updater installer.  It successfully installed the Office 2003 SP3 patch, but didn't catch the junk-mail filter patch.  Still, not to shabby!

The scripts/installers can be customized with include/exclude lists manually if you are willing to do a bit of work.  For my purposes it looks and works great as-is, but it's nice to know you can continue to tweak it out a bit more if you want.

heise Offline Update script 4.0 -- Highly Valca Recommended!

--Claus

Sunday, October 14, 2007

ImageX - Welcome to the Imaging X-Zone

X = ?

The perennial symbol of the unknown variable.

There was Racer X from Speed Racer.

There was Chemical X that professor mixed in when created the Power Puff Girls.

There were those pesky X-Files causing havoc in the FBI for Mulder and Scully.

The search for Planet X has and still causes consternation for some astronomers.

There was that "Man from Planet X."

Now Microsoft enters the realm of "X"....with ImageX.

ImageX = Cool

As I have just posted ( GSD: Drive Imaging and Cloning Solutions ) at our shop we primarily use Ghost as our image/cloning platform.  It is solid and does a good job.  However image captures on our drives can take one to two hours (depending on compression and image placement location). Placing an image on a target pc can take anywhere from thirty-minutes or longer in some cases.  We needed something fast (at least on the deployment side) yet pretty flexible and easy to use.

So we have been playing with Clonezilla which is indeed both fast and flexible.  Image captures take about ten minutes or less for multi-Gig drive.  Image deployments take even less; approximately five minutes or so in some cases.  The reason for the speed is that Clonezilla (unlike Ghost) does only a copy of the drives sectors and data blocks that are actively in use. That means a faster capture time and restoration time.  Good for smaller image files and efficiency, but not so good for forensic work.

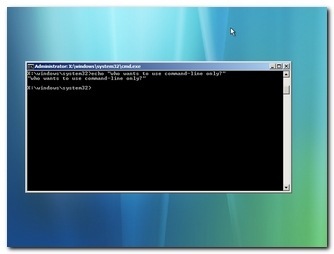
So when I recently stumbled upon Microsoft's ImageX utility that has shipped with Vista (and Windows PE 2.0 via the Windows Automated Installation Kit (Windows AIK) I decided to see just how useful this free utility could be in the imaging process.

What is ImageX?

ImageX is a command-line tool that enables original equipment manufacturers (OEMs) and corporations to capture, modify, and apply file-based disk images for rapid deployment. ImageX works with Windows image (.wim) files for copying to a network, or it can work with other technologies that use .wim images, such as Windows Setup, Windows Deployment Services (Windows DS), and the System Management Server (SMS) Operating System Feature Deployment Pack.

What is ImageX? - Microsoft TechNet Reference

What makes ImageX really neat is that it is not a sector-based image method, but copies the source system's partition in a file/structure based format. So image sizes are radically smaller as you don't have all those unused sector blocks.  Also, it "single-instances" the files, so that one file is stored apart from it's multiple location pointers.  That means one file is imaged even though it may exist in multiple locations. When the image is redeployed, the single file is restored to the multiple locations again. 

It is "non-destructive." This is important to consider. When Ghost and other products put their image on the target drive, they destroy the data that currently exists on it.  ImageX just "overlays" the existing data.  That means that to do a truly "fresh" reimage, you must first ensure your disk/partition has been formatted before putting your ImageX image back. In some cases there might be benefits to not doing a format first and just putting the image back.

ImageX supports three compression formats; Fast, Normal (none), and Maximum. As with most compressions of images, time to capture an image increases as compression is higher.

Finally, you can mount an ImageX image file, add and remove files from it, and (with Vista) even inject drives and patch updates directly into the image.

That last thing is really cool!  Currently with most all imaging solutions, you build a "source" pc, load the patches, install your software, tweak it out, run Sysprep then capture an image.  If you need to go back and add more system updates or drivers, you then have to rebuild your source pc with the updates, re-run Sysprep and recapture the image.  With ImageX (for Vista images) you can just work with the image file and continue to maintain it without going back to the source computer. Neat!

It excludes certain system files from the image automatically: recycler, system volume information, pagefile, hiberfile...etc.

You can "span" an ImageX image file across several CD's.

And it is free..assuming you have included it on a copy of a Windows PE 2.0 boot-disk.

Limitations of ImageX

It's not a perfect solution.

You can only use Microsoft's Windows Image (.wim) files with ImageX.

You can only "mount" images in Windows ImageX from XP SP2, Server 2003 and Vista systems. To read/write them you must mount them on an NTFS formatted partition.

You can captures and apply images for any version of Vista, Server 2003, XP, or 2000 Pro system.

You must first use Diskpart and Format utilities to prep a drive/partition prior to restoring an image and if you use Sysprep first, the image must be deployed to the same volume location as the the original.

It is command line based. (We will get around that in a just a bit with the introduction of GImageX.)

Getting ImageX

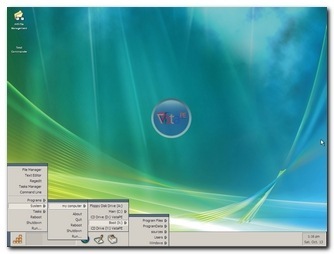
To get ImageX you must first build a WinPE 2.0 disk.

I've covered the process, ITsVISTA has covered the process, and Svrops has covered the process.

Basically, download the WAIK and install it on your XP or Vista system. Then run the special command-line tool.  Copy the needed source files to the build-folder on your NTFS partition, copy the ImageX utility to your build-folder, make your boot-image with the Oscdimg tool included, then burn the resulting ISO to CD.  It's a bit more detailed than that, but not by much. 

Go read the posts referenced and it should be pretty easy to do.

Using ImageX - Capture Basics

Prep your target Windows machine first by getting it patched and set up just the way you want it.  Delete any unneeded files/folders, run a defrag session, empty the browser cache and any temp folder contents, etc.  I recommend running Sysprep first to tuck your source station into bed.

Next decide where you plan to capture your image to.  This could be a network share, a USB external drive, or maybe another drive/partition on the same system.

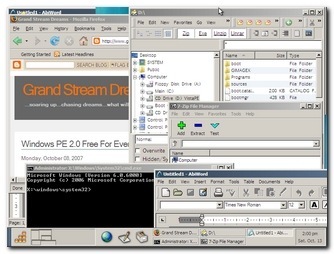
Boot the system with your Win PE 2.0 boot disk.

Once up, type:  net use <drive letter to map>  \\Servername\location

With the specifics entered for your server if you are attempting to map a network drive then image to a network share.

If you are using a portable external drive, you can skip that step.  Just be sure you have correctly identified what drive letter the device is mapped to. Win PE 2.0 seems to be very good about picking up and mounting USB storage devices.

To capture the image, type: imagex /compress maximum /capture c:\ z:\images\image.wim "image name"

You can leave off the "/compress maximum" if you want the image at "normal" level or use "/compress fast" for a larger, but faster image capture process.

You must specify the specific full capture drive letter and path to where you want to put the image. I used "z:\images\" as my example, yours will differ.

You can also add the /check and/or /verify switches as well, though these will increase image capture times.

You can name the .wim file whatever you want.

The final part "image name" (with quotation marks) identifies this particular image file in the image.wim image file.  Does that make sense?  See, one .wim file can actually contain multiple images!  How cool is that?

Please review these excellent posts for more examples and details on the ImageX capture process:

Using ImageX - Deployment Basics 

First you must be sure your target drive/partition is prepped.

Here is a "gotcha" for image deployments for ImageX. 

With Ghost, you (usually) just perform a disk-to-disk copy (all) or maybe a partition-to-partition copy and move on. You don't normally think about formatting the disk and/or the partitions.  With ImageX you must, as it overlays the image on the drive/partition.  If stuff is already there and not removed, the image overlays it and leave all the non-matching original remnants behind.

Likewise, you can't take a "naked" and unformatted drive/partition and just put the ImageX image back on it.

So, boot your target system with your Win PE 2.0 disk.

Next, either partition the drive accordingly (if "naked") or format the boot partition.

A basic command would be something like this example: format c: /fs:ntfs

I've seen several mentions that say a "/q" quick format will work fine, and others that say you must do a full format after creating it with diskpart.

Once your target drive and partition have been prepped, put the image back down.

Map to the network drive just like we previously covered, or use your external USB drive or disk media.

Run the following command: imagex /apply z:\images\image.wim 1 c:

You may want to add the extra option /verify at the end to verify your image laydown...just remember that that adds time to the deployment.

Note the "1" we used.  This means to use the 1st image in the .wim file.  If you have multiple images in a single .wim file you will need to know which "index number" image you want and use that number accordingly.

Once done, remove the Win PE 2.0 disk, reboot the system, and your new image should appear.

Because of the imaging technique, the image restoration to the target pc should be much faster than Ghost or many other sector-based imaging applications. This will depend on the hardware and image size so your results may vary.

Here are some more fantastic posts that provide great examples and details on the ImageX image deployment process:

Using ImageX - Advanced WIM Manipulations

As I alluded to earlier, you can do some cool things with ImageX .wim files.  I'm still a bit unclear after reading all the material.  Some seem to suggest you can mount and change XP, Server 2003, Vista, and Windows 2000 Pro .wim and modify them, other places seem to restrict the mounting and modifications to just Vista .wim images. Some sources suggest that only on a Vista system can you mount .wim files, others that  XP, Server 2003, Vista can handle it (assuming the ImageX .wim filter driver is loaded on the system).

I think I have some experimenting to do... the meantime here are some advanced tips.

A single .WIM file can actually contain multiple images in it.

You can add/remove files to certain .WIM images. (...but not actually "install/remove" programs and configuration settings.)

You can inject drivers into a .WIM image file.

You can install "hotfix patches" into a Vista .WIM image file.

Welcome to GImageX - a GUI Front-End

GImageX is a freeware tool that places a GUI front-end on the command-line utility that ImageX is.

This makes it much easier for non command-line folks to use the tool to capture your WIM images, mount the images, and deploy the images.

Just be sure to copy GImageX.exe and the ImageX files (from WAIK) into a directory during your WinPE 2.0 building process.  That way it will be ready to use. 

Then run GImageX and have at it!

ImageX Command Line Basics

There are a wealth of options that come with ImageX.  However, like most command line tools, they are hard to identify without seeing them all broken down first.  I found the following link useful in understanding the features and options ImageX operates under. ImageX Command-Line Options - TechNet

The following points from that article are important to consider:

To modify your volume images, you must install the Windows Imaging File System Filter (WIM FS Filter) driver on a computer running Windows XP with Service Pack 2 (SP2), Windows Server 2003 with Service Pack 1 (SP1), or Windows Vista. Installing the WIM FS Filter driver enables you to mount a .wim file as if it were a directory and to browse, copy, paste, and edit the volume images from a file management tool, such as Windows Explorer, without extracting or recreating the image.

imagex /apply - Applies a volume image to a specified drive.

Important: You must include the parent directory for the /apply option. Otherwise, when the image is applied, it will overwrite everything in that location. For example, if you apply the image to drive C, the /apply option overwrites everything that exists in drive C with your image files.

/check

Checks the integrity of the .wim file. If not provided, existing checks are removed.

/verify

Enables file resource verification by checking for errors and file duplication.

imagex /capture - Captures a volume image from a drive to a new .wim file. Captured directories include all subfolders and data. You cannot capture an empty directory. A directory must contain at least one file.

/compress [maximum | fast | none]

Specifies the type of compression used for the initial capture operation. The maximum option provides the best compression but takes the longest time to capture the image. The fast option provides faster image compression but the resulting files are larger than those compressed using maximum. This is also the default compression type, used if you leave this parameter blank. The none option does not compress the captured image at all.

While the compression type that you choose affects the capture time, it only slightly affects the apply time.

/verify

Enables file resource verification by checking for errors and file duplication.

The /verify option will affect the overall capture time. During a capture operation, the progress bar indicates the status of the capture operation only, not the verify operation. When the capture is complete, the verify process begins. This process takes time even though the progress bar shows 100 percent.

imagex /mount - Mounts a .wim file from Microsoft Windows XP with Service Pack 2 (SP2), Microsoft Windows Server 2003 with Service Pack 1 (SP1), or Windows Vista with read-only permission to a specified directory.

imagex /mountrw - Mounts a .wim file from Microsoft Windows XP with Service Pack 2 (SP2), Microsoft Windows Server 2003 with Service Pack 1 (SP1), or Windows Vista with read/write permission to a specified directory.
Once the file is mounted, you can view and modify all the information contained in the directory.

imagex /unmount - Unmounts the mounted image from a specified directory. If you use the /unmount option without the /commit option, your changes will be discarded. To be able to save your changes, you must mount the image by using the /mountrw option and use the /commit option when unmounting the image.

Quality Linkage for ImageX

Good luck and maybe Microsoft's X-Zone utility known as ImageX may help you in your image deployments.

--Claus

Drive Imaging and Cloning Solutions

AlvisGoat

Drive Imaging versus Drive Cloning?

I suspect at one time there was a much more rigid technical distinction between the concepts of "Image" versus "Clone".  There still may be, but I suspect that in popular usage, there is a bit more interchangeability between the two.

In general conversations I tend to refer to an "image" (noun) as being the physical data (structure/contents) copied captured off a source drive or partition. I may then apply the "image" to one or more target drives using that previously captured information.  I suppose you could refer to the process of capturing the data off the source drive as "imaging" it (verb), as well as when you image (verb) apply the image to the target.  Depending on the method and software used, it may be a complete image (sector by sector capture of the entire partition/drive -- whether blocks in those sectors are in use or not...good for forensics) or simply a file/folder based image that only captures files/folders/structure that are active blocks on the drive and not any "unused block" sector data.

When I refer to "cloning" a system I tend to refer to using an image to make one or more exact replicas (sector by sector) of a source drive to one or many target drives.  I use "cloning" as a process description or verb form.

Regardless, the point is that what we are attempting to do is copy the system, application, data files, and structure from one hard drive.  It may then be used as a backup to restore back in the case of a failure...or it may be used to replicate that data to other drives.  Imaging/Cloning is a bit more expansive than a "backup" whereas an image/clone should (typically) restore an entire operating system, a backup would simple be concerned with capturing and preserving data for restoration in failure, but not necessarily the operating system itself.

(I'm open to suggestions to correct or fine-tune the distinctions as I am using them here!)

Why Bother?

Well, most home users probably don't care.  They (hopefully) have a "system restore" disk that would allow them to restore their base home pc system to its original "out of the box" state in the event of a catastrophic failure.  Hopefully they have their data backed up separately as OEM system restores only put the system back, not your data. XP and Vista also have a "system restore" of sorts that attempts to restore your operating system to a previously-saved state in the event of bad-things happening.  I've never used it so I can't say how effective it really is.

See also: On Losing Data and a Family Backup Strategy - Scott Hanselman's Computer Zen

XP and Vista both have backup tools from Microsoft...but I'm saving that for a later "backup post."

The real folks who care about image/cloning of systems are enterprise/corporate or small-to-mid sized businesses.  In these cases technicians may need to deploy hundreds to thousands of workstations at once.  Imagine going to each one, putting in a setup disk and setting it up from scratch!  Imaging allows us to build several "base" configurations of laptops and workstations and store that image on CD/DVD media (or USB drives and servers).  Then when we have a new machine or a corrupted one, we just recover the user's data, apply the image (10 min - over an hour depending on the software/technique), reboot, tweak a few things and restore the user's data and we are gone.  Usually in about one hour or less the user is back at work.

It is a real time-saver and helps ensure standard configurations on our platforms.  Yes you do have some time invested in building the source machine(s) the way you want, configuring them, and running sysprep so you don't have to mess with duplicate SID's on your stations (XP or Vista).  If you forget to do that, you would have to go back and use the NewSid utility to reset them....

There are a wide-variety of enterprise class ways to capture and deploy images.  Some of the more popular are Symantec's Norton Ghost, Acronis True Image, and Novell's ZenWorks imaging.  There are also a number of popular Linux-based products.

Freeware Imaging Solutions?

While the enterprise-class image/clone applications are very battle-tested and robust, they often carry large price-tags and can be a bit intimidating for home users (or SOHO users) to approach.

There are a number of free imaging solutions on the Net, here are just a few (in no particular order) each with their own techniques and limitations.

My Perspective

I have used Ghost extensively at work to image and restore drives.  It is a solid tool that works well.  I have used Seagate's DiscWizard ( Hard-Drive Hell and the DiscWizards; A Six-Act Play ) to clone my system when I upgraded my personal hard drive.  I've used Altiris to lay images down at work (but not create), and we are just now starting to use "Clonezilla" as a high-speed imaging tool.

Clonezilla is noteworthy solution as it is freeware/open-source and based on Linux. (Sure, many are.)

However it is fast in capturing images and very, very fast in applying images back to target drives. Why?  Well, instead of doing a sector-by-sector copy of the source drive, it only captures the used blocks on the disk.  Not the unused space.  This saves a bunch of time.It also supports "multi-casting" the image to multiple target machines at the same time.  Very handy for project size deployments.  Images may be "put-back" to a target from a CD/DVD, portable USB drive, or a network share.

This is something we are doing "locally" in our shop, and our "official" enterprise image and cloning solutions remain Ghost-based for now.

However, all this might change soon....Microsoft has waded into the image waters with a free utility for all.

ImageX

...and that's coming up next!

--Claus

Saturday, October 13, 2007

VistaPE Builder Tutorial - Highly Advanced (and Fun!)

Earlier this week I posted about the really cool Windows PE 2.0 that was rolled out with Vista.

I mentioned that is was based on the Vista kernel, that it was 100% free, does take a bit of time to build (but isn't too difficult to do), allows you to boot a system from the CD/DVD, and can do all kinds of wonderful things.  Also, besides being able to make a Windows PE disk, you can use it to make a Windows RE disk...something you would otherwise have to wait for Vista SP1 release to get.

Ho-Hum or Fi-Fie-Fo-Fum?

While I have been surprised at a number of posts I have written getting quite a lot of attention, it seems that Windows PE 2.0 is not a "hot" topic.

Granted, although WinPE 2.0 not a big secret on the web, it isn't one of the more well-known tools either.  I have been surprised in my conversations with other techies that they have no idea it exists.  It appears that for the most part it is a topic dear to only system boot-hackers (in a good way), hard-core Windows troubleshooting support techs, and Windows enterprise-system deployment specialists who know about the Windows Business Desktop Deployment (BDD) solutions.

Microsoft's Windows PE 2.0 really is an amazing tool/environment that comes with some awesome utilities and power.

There are a wealth of quality Linux LiveCD's that allow a system to be booted off a USB/CD/DVD media for recovery or repair.  These ship with friendly and useful GUI shells that most Windows users would find comfortable with.  For pure Windows-heads, there is also the BartPE builder which is based on Windows PE 1.0 (XP) and provides boot-cd support for many familiar Windows utilities and applications.  It has been an indispensable part of my CD-case for years.

So with Windows PE 2.0 being easy to build, but having a very plain (read this command-prompt only) interface....I must grudgingly admit that I can see why it would not appeal to a wider audience.

From this....Windows PE 2.0 (base build)

WinPE2_0

However, that is no longer a good excuse...

Bring on the GUI!

In my earlier post, I mentioned that there was a very good looking project called VistaPE.

It is a utility that helps automate the creation of a true GUI based Win PE 2.0 platform (like BartPE) that you can then easily run compatible applications with in a very Windows-like interface (i.e, point and click with desktop icons, Start menu, task-bar).

I had downloaded it, but it seemed quite overwhelming and I didn't have time to play with it in time for my last post.

I have now...

and it has knocked my socks off.

To this...Windows PE 2.0 (VistaPE build)

VistaPE_base

Which would you want to use?

How To: Build a VistaPE Boot Disk

What I want to do is walk you though using WinBuilder's VistaPE tool to build your own base build of a VistaPE (Win PE 2.0) boot disk.  You can then either play with in in a virtual machine (MS Virtual PC 2007 works fine) or burn it to a CD or DVD media for emergencies.

The VistaPE website and tool(s) have done a great job of explaining just how to use their tool for maximum success.  However it remains a bit overwhelming and even I ran into a few "gotcha's" at first.  Hopefully this might make the tool approachable and spare you just a bit of my own grief.

For the sake of this, we will assume you are building on a XP-SP2 system (though Vista would be fine as well) with at least the main drive/partition formatted as NTFS. Also, be sure your drive/partition has enough space to build the project.  One GB should do nicely for this base project, but two would be better.  You will be creating an ISO file for the disk so you need that room for it as well as the build files you will be getting.

First: Get the "Dry-Ingredients"

  1. Download and Install the Windows Automated Installation Kit (Windows AIK), or
  2. If you have a Vista setup-disk (not the same as a system-restore disk), you should be able to use that instead and skip step one above. It is recommended you copy the files on that disk to your hard-drive just for performance improvement in building.
  3. Download and unpack WinBuilder to your NTFS partition.  It is a .rar file format, but most all compression programs should be able to unpack it. If not, just get and use 7-Zip.  I unpacked mine on the root at C:\WinBuilder. Note: I am using the download-link offered for the "Latest stable version 008 (02.04.2007)" on the download page for this guide.  Again, you can actually put the file anywhere you wish, but it must be on an NTFS formatted partition!

Tip1:  For an added bonus, I would recommend downloading and unpacking the following file handy: GImageX, but it is not required. If you want to skip this, don't worry about it now...I'm saving it for my next post.

Tip2: If you forget for some reason to do this on a NTFS formatted partition, when you run the final build file (virtually or off a burned disk) it will boot to a point but then stop at the following error: "...winload.exe is either corrupt or missing."  That's because you didn't do the building on a NTFS formatted partition. If this is the case find and move your WinBuilder folder and contents over onto one and try another ISO build again.  It should work fine the second time.

Second: Get the "Wet-Ingredients"

  1. Browse to where you unpacked WinBuilder and run the exe file.
  2. The version I am using reports "WinBuilder 072" in the title bar.  If yours is different you probably can still follow the principles outlined here, but some of the references might not exactly match.
  3. Take a moment to examine the window. There are two tabs "Web" and "Download" as well as some icons "Play," Tools," and "Refresh."
  4. Click on the "Download" tab.
  5. The program goes to the default "Web Servers" checked in the bottom corner and via the net pulls down two default "projects" and their component scripts.
  6. On the left hand side, you should now see "Recommended" in a drop-down option box, with the projects "VistaPE MultiBoot (BETA)" and "VistaPE Main Site".  Let's leave it on "Recommended" for this build run.
  7. Let's uncheck the "BETA" one for now, and leave just the "Main Site" project checked.
  8. Note that on the info area for this tab you should see that you are have 26 files selected and about 9.36 MB of data to download.
  9. Click the "Download" button at the bottom and the WinBuilder will begin fetching the files and scripts needed for your project.  A "Projects" folder will be automatically created in your C:\WinBuilder\ folder (or whatever you called yours) and the files placed into there.
  10. On the right hand side you will see the detail elements being ticked off as they are obtained with a download status bar showing the progress.
  11. WinBuilder should restart when done.

Additional notes:  If you want, play around on this page. Note that when you select other Web Servers, additional projects or project sub-elements appear.  There are a lot of cool ones so take your time exploring.  Also, under each project should be some "+" signs. You may expand these to see what the projects elements contain in more detail and select them to be individually included/excluded.  Finally, the drop-down box allows you to fine-tune the project with "Minimum," "Recommended," "Complete," or "Beta" levels of element inclusions.  Again, try different options to see what happens.

Third: Dump in the Bowl and Mix

You should now see that a third tab has been added.  This is the "Scripts" tab.  It has a four-tabbed element screen on the right with tabs for "Scripts," "Paths," "Log," and "Code Box."  Now the fun begins!

  1. Click on the "Paths" tab and set your Source directory.
    • If  you are using the WAIK and installed it to the defaults, browse to the following location using the folder icon next to the blank line: "C:\Program Files\Windows AIK". Or,
    • If you are using a Vista setup disk, you probably should have first copied the setup files to your drive, so point to that location, or the DVD if you didn't. 
    • Note: The Vista disk is not required...the WAIK installation works great by itself.
  2. The "Target directory" is set by default.  I would leave it alone for now.
  3. The "ISO file" location and name is set by default.  I would leave it alone as well.
  4. Click the "Scripts" tab (next to the "Paths" tab) again.
  5. If you also click the "+" on the left-hand side next to "VistaPE" project, you will see the project elements listed in detail. Each of these also has a "+" you can select to expand if you find it helpful.

Fourth: Season to Taste

  1. Back on the "Scripts" area on the right-hand side you should see two small and blue arrows (forward and back) separated by a light line.  These allow us to step through the project elements and "tweak" the build. Let's do that now.
  2. Click the little blue "forward" arrow.
  3. Notice we are now in the "0 - PreConfig" sub-element area of the project.
    • You may select the tool for WIM management. I recommend you click the drop-down and change to "ImageX" instead of the default option. To do this, you must have installed the WAIK.  Leave the location path for WAIK below alone, unless you installed it in a non-standard location. TIP: I WOULD recommend browsing to the listed location, just to be sure the program picks up the location in it's settings.  It has been my experience if you don't do that (browse and select anyway) that WinBuilder will revert back to WimUtil in the final building stage.  I don't have any issues with WinBuilder, but on all my XP systems (Pro/Home) ImageX worked much better while WimUtil seemed to stall/pause.
  4. Click the little blue "forward" arrow again.
  5. We are now in the "1 - Copy Files" sub-element.
    • If you are not using a Vista DVD, then uncheck the "Same recovery tools" checkbox. It won't hurt if you leave it checked but are using the WAIK, but doesn't hurt either to remove it if you don't.
    • Notice the "Copy Custom Folder" checkbox.  If you make a "\Custom\VistaPE" subdirectory in your C:\WinBuilder\ folder, then any files\folders added manually by you into this location will be added to the root of the media disk you are building.  This is REALLY awesome as it lets you place additional 32-bit applications (most "standalone\portable" applications work great) on the disk for use.
    • If you did download the GImageX utility earlier, go ahead and make the "C:\WinBuilder\Custom\VistaPE" subfolders and place the unpacked files in there.  If not, no biggie...
    • Leaving the "Clearing Target Folder" checked forces WinBuilder to empty the build-location folder it uses to create the disk, before it starts the build process.  I generally leave it checked, but it does add extra time in building if you uncheck it.  So let's leave it checked for now.
  6. Click the little blue "forward" arrow again.
  7. We are now in the "2 - New Hives for VistaPE" sub-element.
    • Just leave "Clean custom registry files" checked.
  8. Click the little blue "forward" arrow again.
  9. We are now in the "3 - Shell & Config" sub-element.
    • First we have a drop-down to set the FBWF value.  I must confess, I didn't know what the heck this was at first.  It is the "File-Based Write Filter" which allows PE "...to maintain the appearance of read and write access to write sensitive or read only storage. FBWF makes read and write access transparent to applications."
    • I just left it at the default "64" setting. Once you get used to building, you can fiddle with higher values.  64 seems to work fine for my tests on various systems.
    • Set your default screen resolution for VistaPE.  While 800x600 should be compatible on most all displays, that resolution irks me.  So I always set mine to 1024x768. Your call.
    • Leave the "delete work folder' checked.
  10. Click the little blue "forward" arrow again...repeat as needed.
    • Now you will jump down into "Apps" elements (and others) and can set custom options for these as you advance through them with the forward arrow.  I would just leave everything set as-is for now.  They are generally very self-explanatory.
  11. Click the little blue "forward" arrow again until the "6 - Finalizing..." section appears.
    • Leave the "Pack boot.wim" box checked.
  12. Click the little blue "forward" arrow again.
  13. We are now in the "7 - Create ISO" sub-element.
    • If you wish, you can give your volume name a different name.
    • Let's leave the "Show mkISOfs window" and "Compatible mode" boxes checked.

We should now be all set.  If you want to go back and check something in your project configuration, you can either click the little blue "back-arrow" or just click on the specific element on the left-hand side tree structure...just be careful to not accidentally uncheck something.

Fifth: Bake Well

All ready?  Good!

I didn't mention this earlier, but you probably will want to be using a broadband connection to the net for this.  We are about to download files to build certain parts of our creation and that might take a while on dial-up.

  1. Click the BIG blue arrow "Play" at the top-right of the WinBuilder window.
  2. WinBuilder will start to process the build.
    • If you are prompted to install a driver, click "OK".  This allows WinBuilder load the ImageX filter driver used to mount the WIM (Windows Image File) and make changes to the base one shipped with the WAIK or Vista DVD).
    • If something errors out, that (usually) doesn't prevent the build process from completing, just that element may fail to work.
    • Depending on the addition of extra files you want added, the copy files process may take a bit.
    • You will see a nice progress meter for each stage of the process.  If additional programs are needed, it will attempt to go and fetch them.
    • For the "6 - Finalizing" stage, you may see a "boot.wim" window appear.
      • Sometimes at this stage it appears to "hang" after a while (give it some time first you should be seeing hard-drive activity).  You should notice a little new wimutil.exe icon in your system tray (by the clock).  Click on it and see if there is a check next to "script paused." If so uncheck it and the boot.wim window should go away in a moment.
      • I've noticed that sometimes it seems that WinBuilder wants to reset the WIM manager back to WimUtil, even though we selected ImageX earlier at the beginning.  You might want to go back and confirm ImageX is set under the "0 - PreConfig" sub-element area of the project before clicking the "Play" button. That will (usually) ensure that you use ImageX instead of the WimUtil utility.
    • If all is well you should see a DOS window for mkISOfs pop up and it will show the progress of rolling up the ISO file.  Depending on your system and how many (if any) custom files you added, this might take a moment, but should be relatively quick.
  3. When done you will be back to WinBuilder with the "Log" window displayed.
  4. I usually have at least seven "errors" and you can explore this window if you want.

Let's Play!

At this stage you can go into the ISO folder of your WinBuilder location and find the ISO file.

To play with it you can burn the ISO to disk, using your favorite ISO burning tool.  Mine is BurnCDCC for it's simplicity.  Then in a system that has the BIOS set to boot from CD first, pop in the disk and boot the system.

I prefer to first test my boot-images using Virtual PC first to avoid making coasters.

WinBuilder does allow you the options (under the Finalize element" to burn the ISO directly to a cd when done as well as run the ISO in a VirtualBox session automatically.  You do have to have VirtualBox (freeware) installed on your system prior to doing the build with this option selected, however. WinBuilder provides you a link to the site or you can get it here.

If all went well, you should see a GRUB4DOS boot loader. You can select the default (VistaPE) or one of several other options.  This really comes into play in the advanced and beta build projects.  For some of them you can also install MemTestx86, other Windows boot options, as well as Linux "livecd" builds.  It is really amazing.

When the default configuration comes up, you should see command-line box with the Win PE 2.0 doing some initial PE 2.0 work.  It's turning on some services and starting a network connection.

Then you will see the PE Shell Swapper window come up that will allow you (briefly) to select a different shell as well as screen resolution.  Just wait for it to tick down or hit the "Go" button.

The default window shell should then load and you will have a task-bar, "Start" like button (the yellow dots) and a file-manager icon on the desktop.

For some reason Total Commander didn't seem to download and install nicely, so you might need to go back and manually download and add it to the build structure.

So what can you do? Well, a lot, but not too much in this basic build.  But I wanted to cover the basic (easy) approach first as it was a quick and easy way to get familiar with the WinBuilder program and process.

Advanced Cooking Class

If this worked successfully for you and you are comfortable, try selecting the VistaPE Project again but going into all the detail sub-project elements and selecting them ALL or even maybe the VistaPE MulitBoot (Beta) at "Recommended" setting for your second attempt.

Then expand and go into the details "+" sub-project elements and click-away to your heart's content adding additional tools, recovery options, applications, office applications, Firefox browser...etc.

There are so many options and possibilities, it is simply amazing. 

Once you have picked all the elements you want to add, and have everything checked off (tip: by default some sub-element items are not checked, even though the upper box is, to select all at once, uncheck the higher element then re-check it.  The container objects underneath should all be checked now). 

If you are doing the VistaPE MulitBoot (Beta) project, pay special attention in deciding if you want the "VirtualTest", "Slax Linux," and "OtherOS" options checked.  That will greatly increase the download/build time as well as space required to build. 

Make sure you have sufficient quantities of both!  And forget about doing it without a broadband connection to the net!

Then follow the steps again to "Download" the script elements first.

Finally, when the downloads are done, go back to the "Scripts" and walk through all the options again and adjust accordingly.  It will take much longer this time but the steps I've outlined should be pretty-much the same.  Hit the "Play" button when you think you have it all set up the way you want and let the building begin.

At first it may be a bit confusing for the uninitiated in selecting your build project (VistaPE or the Vista PE Beta) and then selecting the default/additional script sub-project items and individual elements/programs for inclusion.  I don't really feel I have done as good as I job as I would like explaining that part, but take a while to play with it and select down through the sub-project elements and you should see what I mean.  You will pick it up quickly after the first couple of project builds you create.  Then you can begin selecting other project servers and looking at the additional projects they offer as well.

Crème de la Crème (a VistaPE Maxed-Out Build)

VistaPE_Maxed

See what I mean?!!!

Final Thoughts

WinBuilder and BartPE are very similar in that you need to have some base Windows files to build the PE environments...with BartPE you have to have the XP setup disk and WinBuilder does not require a Vista setup disk if you have the WAIK instead.  They both are based on scripts, but with BartPE, you must manually download the "plugins" into a plugin folder then download and configure (if needed) many of the actual applications you want to add.  WinBuilder allows you to select the scripts/applications you want, then goes and downloads/and installs them for you automatically.

BartPE requires you to adhere to Microsoft's more restrictive PE 1.0 licensing requirements for usage.  Win PE 2.0 is free and open for all...no version of Vista setup disk is technically required to build these disks.  No limits on how many you may create or have in use at any given time.

BartPE does allow you to "slipstream" XP SP-2 in the build process if you only have a XP or XP SP-1 setup disk.  This is a nice feature.  Vista doesn't have SP-1 released yet and I don't know what real value it could add to the Win PE 2.0 environment.  However, I am sure the the WinBuilder team will be taking this into consideration if they feel it is warranted, but I really don't think it will be (at this stage at least).

I love and will continue to use BartPE disks, but VistaPE will likely be an integral part of my CD-case from now on as well.

Props to NightMan and his team of contributors who have really done an outstanding job with this project.  Version 10 (Beta) looks to be even better and I can't wait until it gets released!

Here are some more WinBuilder help website pages that might be of help:

WinBuilder Help Manual

WinBuilder Start Guide

VistaPE - Configuration

I've tried to be as accurate as possible in my post.  If you find something incorrect or radically different, please let me know.  I hope that this encourages others to play with this powerful PE 2.0 building tool of NightMan's.

Next Post

The real reason why I've been posting on WinPE 2.0 will be revealed in all its glory!

Stay tuned...as cool as all this has been, it has just been buildup and foundational work!

We are about to enter into into Microsoft's "X" zone!

--Claus

Monday, October 08, 2007

Windows PE 2.0 Free For Everyone (Almost)

There are lots of ways to work on a Windows system "off-line."

By "off-line" I mean without booting the primary OS that is installed on the system.

The Strange but Dependable

I have used many a Linux "Live-CD" to edit/delete files and work with partition-management. However, my primary reason for using a "Live-CD" is usually to boot an otherwise un-bootable Windows system, mount the drive(s), then recover the user data to either a network share via FTP or (rarely) a USB device.

For many of these such disks, check out The Live CD List.

The following assorted items in particular might be interesting to look at.

Then came into my life...

BartPE and PE Builder

Bart PE allows you to create an XP SP2 Windows PE (Preinstallation Environment) boot disk.

You must have an original Windows XP or Windows Server 2003 installation/setup cd. The Restore disk that often ship with most systems won't cut it. That is the only real caveat. No disk(s), no BartPE. This is due to licensing issues with Microsoft. Read Bart's link there for the details.

That said, if you have the goods and the time, you can quickly build and burn a base BartPE disk in about an hour or less. You can also slipstream SP2 if you have an early release version.

BartPE is very slick, and with a bit of work, you can add other applications (plugins) to the compilation before mastering, such as applications, drivers, etc. It is really cool and the more time you spend with it, the more you can load on the disk and get to run.

See the trick/benefit here is you can boot a "dead" system in most cases with the BartPE boot disk and get a familiar Windows XP type environment to do your recovery work in. So if Linux scares you, this might be a great answer.

Screen shots

The web is awash with great articles (not that Bart's own site isn't helpful enough already) with guides and tips and plugins to explain and enhance BartPE. So I won't add to that soup.

I do have a "clever" thing I do in building my own custom BartPE disks, but that will be another post.

So if you want to create one of the coolest recovery disks out there, stop by and play with BartPE (assuming you have the right source media first).

Windows PE 2.0 (Vista Baby!)

With Vista the whole Windows PE thing changed.

Windows PE 2.0 for Windows Vista Overview - Microsoft

Microsoft Windows Pre-installation Environment (Windows PE) 2.0 is a bootable tool from Microsoft that provides operating system features for installation, troubleshooting, and recovery. Windows PE is not a general-purpose operating system. Instead, it is designed to be used for three specific tasks:

  • Installing Windows Vista. Windows PE runs every time you install Windows Vista. The graphical tools that collect configuration information during the setup phase are running within Windows PE. Additionally, information technology (IT) departments can customize and extend Windows PE to meet their unique deployment needs.

  • Troubleshooting. Windows PE is also useful for both automatic and manual troubleshooting. For example, if Windows Vista fails to start because of a corrupted system file, Windows PE can automatically start and launch the Windows Recovery Environment. You can also manually start Windows PE to use built-in or custom troubleshooting and diagnostic tools.

  • Recovery. Original Equipment Manufacturers (OEMs) and Independent Software Vendors (ISVs) can use Windows PE to build customized, automated solutions for recovering and rebuilding computers running Windows Vista. For example, users could start their computers from Windows PE recovery CDs or recovery partitions to automatically reformat their hard disks and re-install Windows Vista with the original drivers, settings, and applications.

What OS is it based on at the core?

Vista.

(Yes, Vista baby!)

So who can get this new toy?

(Almost) Anyone.

Do I need a Vista installation disk? - Not really, but it is helpful.

Do I even need to have Vista? - Nope.

Am I limited with how many I can run at one time or create? - Nope.

See? Isn't this cool!

Getting the PE 2.0 ISO Built

First you need to get the Windows Automated Installation Kit (Windows AIK).

Go download it for free from Microsoft.

(For more TechNet information on the WAIK click here.)

It can be installed on any of the following systems: Windows Server 2003 SP1; Windows XP SP2, and Windows Vista.

Note: The installation application says it must be an XP Professional version, but I just installed it and ran it on my Windows XP SP2 Home system just fine with no complaints at all.

Once downloaded, you have an IMG file which you then have two options to use.

1) Burn it to disk using a disk-burning application, or

2) Mount it as a virtual cd/disk image using a virtual disk application like the freeware SlySoft Virtual CloneDrive.

Run the installer and get it loaded up.

ITsVISTA has a great HOW-TO guide on this whole process with useful screen shots:

Installing Windows AIK without a Disc is Free and Easy - ITsVISTA

Next comes actually creating the boot-disk.

Again, it's not a difficult process. Actually it is much easier than making a BartPE disk!

I recommend reading these two posts for the process:

Toss DOS, Install Vista with Free WinPE - ITsVISTA. (Pay attention to the step about copying the ImageX executable in step 3. If you are following his steps, you want to use the following command he left out: copy "c:\program files\Windows AIK\Tools\x86\imagex.exe" c:\winpe_x86\iso\ all on one line just as it shows in the command prompt window right under step 3.

His steps are so easy to follow and I've done many just this way.

For a bit more explanation about what you are doing, you might also read this one from APC Magazine: Windows PE 2.0: a tiny version of Windows for system maintenance.

Once built, burn the ISO file you created to cd and play away.

I would recommend loading it in a Microsoft Virtual PC 2007 session to verify it works before burning it and to get used to the command-prompt like base-environment.

It does have some limitations:

Because Windows PE is designed to be as lightweight, powerful, and flexible as possible, it has the following limitations:

  • The computer must have a minimum of 256 MB of RAM.

  • Windows PE doesn’t fit on floppy disks, but you can write a Windows PE image to a bootable CD.

  • Windows PE requires a Video Electronics Standards Association (VESA)-compatible display device and will use the highest screen resolution it can determine is supported. If Windows PE can’t detect video settings, it uses a resolution of 640 × 480 pixels.

  • Windows PE supports Distributed File System (DFS) name resolution only to stand-alone DFS roots.

  • You can’t access files or folders on a computer running Windows PE from another computer. In other words, the Server service is not available within Windows PE.

  • Windows PE supports both IPv4 and IPv6, but it does not support other protocols, such as Internetwork Packet Exchange/Sequenced Packet Exchange (IPX/SPX).

  • Drive letter assignments aren’t persistent between sessions. After you restart Windows PE, the drive letter assignments will be in the default order.

  • Windows PE doesn’t support the .NET Framework.

  • Because Windows on Windows (WOW) is not supported, 16-bit applications won’t run in 32-bit versions of Windows PE, and 32-bit applications won’t run in 64-bit versions of Windows PE.

  • To prevent its use as a general-purpose operating system, Windows PE automatically restarts after 24 hours from the initial bootstrap.

  • Additionally, Windows PE includes only a subset of the Windows Vista Win32 application programming interfaces (APIs), including I/O (disk and network) and core Win32 APIs. Applications that require any of the following Win32 APIs will not run in Windows PE: access control, NetShow Theater Administration, OpenGL, power options, printing and print spooler, still image, tape backup, terminal services, user profile, Windows station and desktop, Windows multimedia, and the Windows shell.

I have seen mention elsewhere that it can now run up to 72 hours before requiring reboot, but cannot confirm that myself. I cannot imagine running it that long in such a marathon session. If it is taking you over 72 hours without rebooting to do a rescue/recovery...you really have bigger problems! ; )

Cool Thing #1- Add more Applications

Once you get familiar with making the base PE 2.0 disk, you can start to add in some of your favorite "portable" Windows 32-bit applications to the disk, pre-ISO build. Then you can run many of them via the command-line and they will then execute and be displayed in all their GUI goodness.

It does take a fair bit of experimentation and comfort with the command-line environment to get started with this, as well as knowing some tricks with PE 2.0 to get the network connections started.

As I get more time and experience, I will pass these tips and commands on to you.

Cool Thing #2 - Make a USB version

You can make a bootable USB version of PE 2.0.

Really.

Check out both of these helpful posts and decide which you can follow the easiest.

Creating a bootable WinPE 2.0 CD and/or USB Flash Drive - Svrops.com

Creating A Bootable WinPE 2.0 USB Key - Josh's Windows Weblog

Cool Thing #3 - Make a VistaPE GUI version

VistaPE - Home

VistaPE - All the specifics.

Screenshots and Download links.

Now, I haven't had the time yet to play around with this building toy, so I can't say how easy it is to use and modify. I suspect there will be a bit more work that BartPE's similar program for XP. However, it looks pretty amazing and would be great for folks who just don't like the command prompt work for the base builds.

When time allows and I have done some hands on work with this building utility, I will do a new post on my experiences.

Bart Lagerweij (of BartPE fame) hasn't publicly stated for the record if he has a BartPE 2.0 version in development or nearing release. I would suspect so, but considering the work and investment it has taken to make BartPE for XP so wonderful, it may be a while before we see a BartPE 2.0 and BartPE 2.0 Builder just yet.

So the faithful remain patient and hopeful in the meantime.

Vista SP1 Recovery Disk

Long Zheng goes on to note that one of the features in Vista SP1 will be the creation of a recovery disk. While no doubt using the PE 2.0 framework under the hood, this special disk should be easier for average users to create and use in a pinch, without having the command prompt GUI to scare them away (but likely without the ability to add custom applications/software to the disk as well.).

A Vista Recovery Disk will be a welcome tool to many a system administrator's toolbox, but I suspect that Win PE 2.0 will remain popular with the IT crowds.

(Note: If you want to make your own version early, keep reading...(or just click here) it is based on the WAIK PE creation we have already covered....)

Windows RE (Recovery Environment) versus Windows PE (Preinstallation Environment)

From what I can tell, Windows RE and Windows PE are not quite the same thing. Windows RE is what will become the aforementioned Vista Recovery Disk in Vista SP1.

Introducing Windows Recovery Environment (Windows RE)

The Windows Recovery Environment (aka Windows RE) team would use this blog to share information, tricks and tips about Windows RE with support professionals and end-users of Windows. We would also like to use this blog to get feedback from the community.

So what is Windows RE?

Windows Recovery Environment (Windows RE) is a recovery platform based on Windows Preinstallation Environment (Windows PE). Windows RE provides two main functionalities:

1. Automatic diagnosis and repair of boot problems using a tool called Startup Repair.

2. A centralized platform for advanced recovery tools.

We will explain more about these two functions in upcoming posts.

Windows RE is new for Windows Vista and completely replaces the recovery console in Windows XP. You should be able to perform most tasks of recovery console from Windows RE.

I found this information on the blog Windows RE Notes that has lots of great details on Windows RE.

For the Hard-Core

Here are some additional links I have found on the PE 2.0 subject that readers might find helpful resources as well:

Pe 2.0! Full Building Instructions! - The CD Forum

HOW TO: inject drivers into Microsoft's free OS, Windows PE 2.0 - APC Magazine

You cannot install Windows XP successfully after you use Windows Vista or Windows PE 2.0 to create partitions on a hard disk - Microsoft KB931760

Windows Vista: Getting Ready for Windows PE 2.0 - TechNet Magazine, November 2006

Windows Preinstallation Environment Overview - Windows Hardware Developer Central

I hope all this link collection I have done becomes a useful resource to someone.

Have fun building!

--Claus