Sunday, July 11, 2010

iodd : Multi-boot madness!

Like many computer technicians and responders, I seem to always have at hand a collection of bootable media; CD’s, DVD’s, USB-HDD’s, flash media, etc.

Each one allows me to “off-line” boot a Windows system to service it, image it, pen-test it, or examine it.

The end result is a large CD-carry case and a handful of USB sticks along with one or more USB external hard drives.

There are a couple of note-worthy multi-boot Linux distros out there, and with some clever work you can make a USB stick able to multi-boot various WIM files.

However there really isn’t an all-in-one solution to conquer them all.  You know, a “…one-ring to rule them all…” solution.

I had wondered for some time if it was worth the effort to spend working on a custom “Super-Boot” USB-based HDD system, based  perhaps on the GRUB bootloader or maybe one of the myriad other boot loaders.  I had collected a wealth of links and then promptly put off even addressing the headaches this might bring.

TinyApps.Org bloggest Miles was also apparently struggling with this model of multi-boot image management.

In his post  Boot any and all ISO images from USB drive he outlined a smorgasbord of possible solutions to the same issue.

In the end he met with success via the iodd 2501 hardware device.

And in an added surprise, kindly sent one to me as well, just last week.

Here are my thoughts.

Hello iodd! 

imageThe iodd is a little bit larger than two decks of playing cards placed side by side. (image on left captured from iodd web-site page and used solely for illustrative product purposes.) 

It accepts a 2.5” SATA “laptop” hard disk drive.

It can be connected to a system via USB (y-cable included) or SATA2 connection (with power draw from co-cabled USB port).

Is has a physical “write-block” switch.

At this point it sounds like most any other external USB drive….but wait!  There is more!

If you create two partitions, the first being a FAT32, and create a “_ISO” folder in that partition, and then dump any bootable ISO file image into that folder, guess what?  Amazing things happen.

You can plug it into a system, use the toggle switch to jog to the ISO image you wish to use to boot (it will display on a LED readout all the file-names present in the _ISO folder) and the press in the toggle button to select it.  Then boot the system (assuming BIOS USB-based boot support is present) and the ISO will load and run!

It can also operate on a “live” system as an external HDD like you are used to, or as a virtual CD emulator, or both.

If you happen to have an ISO image of say, a movie, you can play that too.

That means if you have installation media converted to ISO format, you can load them up, and change them, for installations.

Simply amazing.

In one fell swoop, you can do away with almost all of your CD/DVD media and keep them all on accessible from this single device.

Assembly

The device itself consists of a hardware/display component with a plastic “hanger” skeleton to hold to drive.  The front and back plates are aluminum and slide on/off the hanger to encase the skeleton and drive.

Here’s a video on the disassembly:

Disassembling the iodd

Once apart, load in your SATA drive, carefully.

Since I don’t have a spare 2.5” SATA drive lying around, I went out and picked up a WD 640 GB drive, with 8 MB cache and 5400 RPM.  That was a mistake.  Although it did fit, it seemed a bit “thicker” and the case covers were very difficult to slide on.  It was tight as all get-out.  That coupled with the fact that no matter what I did or which additional hardware tool I used to try to connect to the drive, the drive just didn’t spin up, meaning I possibly pulled a bad drive from the store shelf.

Upon return/exchange, I then went with a Seagate 320 GB drive, with 16 MB cache and 7200 RPM speed.  I understand that “smaller” drives tend to not be as power hungry as well so hopefully the smaller size will be offset by the faster RPM and larger cache for performance.  It did fit into the enclosure much easier and the case lids slid closed much easier as well, for what it’s worth.

Then reassemble, carefully!

Assembling the iodd

One thing that is easy to miss is that at each of the corners of the long-sides are tiny molded plastic pins that snap into the side screw mount holes on the drive itself.  If you aren’t careful you could bend/break them.  So pay attention!  They might also bend and not fully snap in during the process so make sure they are correctly seated before you attempt to install the case lids.

Drive Prep

Depending on the condition of the SATA drive, you can either prep it (format) inside the iodd device or outside the device before installation if you happen to have an USB-external drive cable connector kit handy.

The current requirements seem to be that you can have multiple partitions on the device with multiple format types. However, the first must be FAT32.  Note TinyApps found that doing a FAT32 using OS X’s disk utility didn’t work.

I myself used Windows 7’s own storage management tool to make mine.

However, if you want to make your primary FAT32 partition larger than the stock 32 GB limit, we both unequivocally recommend using the free FAT 32 Formatter utility from Ridgecorp.  Even easier for the masses is their Windows GUI version of fat32format.  Want a 100 GB FAT32 partition? It’s yours with this great tool!

I was a bit OCD and used this GB to MB unit converted to make mine exactly 32 MB reported size.

I stuck with the 32 GB partition because, really, I don’t need more than that many ISO images to store on it (doubt I will even come close) and besides on a more practical level, the more you get on there, it takes a long time to toggle through them all to find the one you wish to select.

I used the remaining space to create a second simple volume and formatted it NTFS so I could land large (over 4 GB) image files if needed.

The product includes a foldout iodd2501_manual but it really is more than a little bit light for anyone but the really hard-core tech crowd who wouldn’t bother reading the manual anyway.

Instead download the full iodd manual (english) which covers everything (and then some) that you need to know about the device, from field-dressing the parts to software, to drive prepping, to usage, all in incredible detail for an overseas product.

Spend some time also acquainting yourself with the following additional on-line support resources:

Final Device Prep

Once the drive is formatted and installed, and connected, you will need to go to the first partition (your FAT32 one), and create a folder called “_ISO” on the root of that drive letter.  It is into this folder you may next place all your ISO files.

Next I wanted to update the firmware to the latest version.

However, the executable isn’t support (apparently) on x64 bit systems, of which mine are.

So instead I went the easier way and downloaded the latest firmware in ISO format (Firmware Upgrade v1.42.24 (iso) ), copied the ISO file to the _ISO folder on the iodd, then selected that one.  Bam…it loaded the ISO, installed the firmware directly, and was done!  Easy and all internal to the device.

There are three “modes” of operation, CD-Mode, HDD-Mode, and “Dual-Mode”.

To use the device to pick/load an ISO, just toggle through the list of your “installed” ISO files (it appears arranged by the order copied to the folder rather than alphabetically) and once it appears on the bright blue LED readout, press the toggle switch “IN” to select/load it.

Because the ISO holding drive is FAT32, you can’t use/store/access ISO’s larger than the 4 GB file size limit, which is a drag if you have a Blu-Ray movie ISO or a distro image file that is DVD-sized.

However, you can use a File Splitter (Windows) offered by iodd or any other so long as you stick with the proper file-splitting naming convention it expects.

More Videos

Here are some more videos (mostly in Korean) that show the device in action:


iodd in hdd mode


iodd cold-booting a Fedora 9 LiveCD ISO


iodd in video disk (ISO) emulation mode


Where do I get one?

TinyApps secured his from LinITX.com, but they appear to be out of stock at the current time.  I’m confident with some Google or Bing work you can track down a source. 

A forum source linked to I-Odd USA as the company’s US web-presence location, but it doesn’t seem to be linked from the mothership web page, so I cannot (for now) certify it’s authenticity but it seems legit at this point.  Use your web-spidey-sense accordingly.

Currently listed at the time of this post at $70 USD there.

Where do I begin with ISO’s to load on it?

Here is a lineup of the ISO’s I’m loading on mine, each in various grouping of need.

I’m obviously not including installation/setup disks, but examples might include Windows OS installation media, MS Office setup disks, various programs requiring installation from optical media, etc.

Look over them closely and come back often, I was surprised to see that many have newer release versions!

All are free, unless specifically noted.

System Administration/Support Distros

All of these are tools I keep at hand for response to troubleshooting/stress-testing/repair-response to Windows systems.

Another option? Slap a WinPE build with ImageX present, then use the other larger partition (NTFS) to acquire and apply ImageX WIM files of system images (you could do the same with Clonezilla as well)…heck!  Do both!  The iodd device makes it possible.

Forensics Distros

Couple that fact that the iodd can be set up with multiple partitions and can (in theory) support just about as large as a 2.5” SATA drive as you can cram into it, and that it has a hardware-based write/block switch to prevent accidental/malicious write-back to the device, the iodd might make a great forensic distro boot launcher and image file collection system.  OORAH!

And I’ve not mentioned the many commercial distros as well such as ForensicSoft, Inc’s SAFE (System Acquisition Forensic Environment) tool also based on WinPE.

Security/Pen-Testing Distros

Desktop Replacement Distros

Sometimes it’s handy to have a “LiveCD” bootable OS environment that isn’t based on the local HDD.  Very good if you’ve got a particularly dead system at hand.  These are my all-time favorites…

Converting Disk media to ISO files

Of course, sometimes you can’t just grab an ISO out of the box; you have to make one from, say, your setup installation media disks.

Assuming there isn’t any copy-protection preventing it, almost any of these great free utilites could be used to rip your optical media disk(s) to ISO format.

Don’t forget the FAT32 file size limit of appx 4GB still stand and you may have to use a File Splitter (Windows) offered by iodd or any other so long as you stick with the proper file-splitting naming convention it expects.

That said, I’ve had good luck with these.

Final Thoughts

While the iodd won’t replace my 32 GB custom WinPE bootable flash stick as my primary Windows support weapon, it has just rendered the piles of CD/DVD boot media I carry obsolete in one fell swoop.

Special thanks again to TinyApps bloggist Miles for making this journey possible!

And in the immortal words of a young neighborhood kid just down the street from your average superhero family…after looking into the capabilities of the iodd….I only have this to say…

Totally Valca Recommeded!

Cheers!

--Claus V.

Saturday, July 10, 2010

Micro-Linkfest

The last two tropical storms in the Gulf of Mexico have done a real number on us.  Despite going into the northern costal part of Mexico, they kicked up enough moisture in the atmosphere to drench us here in the metro-Houston area with considerable wetness.

The end-result are pockets of water that have now bloomed with mosquitoes.  This morning I sprayed the entire outside entryway door area with repellant to keep the buggers from hitching a ride inside when the door is opened/closed.  So far it seems to be holding.

This is a light post as most of the week has been spent playing with and configuring a new toy system support tool that came in Monday from Hawaii courtesy of TinyApps.Org.  So that post will be the doozie.

Snack on these in the meantime…

  • Posterous can now import from Blogger: let the exodus begin!
  • Unlocker – (freeware) – Now supporting x64 Windows.  Not “standalone/portable” but still a strong tool.  Note reviews below and that the installer now comes with the <insert sarcasm> added support for toolbar and eBay shortcut installations as well.  These can be opted-out. Reviews and more feedback below
  • Work under way to add sidebars to Google Chrome – Download Squad.  I’m really hoping this gets delivered soon.  I really would use Chrome much more if I could leave my extensive bookmarks open in sidebar while browsing like I can do in Firefox.
  • Installing Windows Virtual PC on Windows 7 Home Editions - Virtual PC Guy’s WebLog.  Ben Armstrong (maybe) clears up some mis-information by Microsoft regarding XP-Mode and Virtual PC on Windows 7.  Windows 7 Home edition does allow for installation of Windows Virtual PC (not just the older Virtual PC 2007 version).  Windows 7 Home edition will not allow you to run Windows XP Mode “out of the box” with a download of a pre-configured/activated XP VM that users of Windows Ultimate/Professional/Enterprise can get.  However, if you do have a spare XP CD/license laying around, you can then load it in a new VHD, and then get all the features of XP Mode yourself. Oh. Thanks for the confusion Microsoft.  Per Ben..
  • To clarify – “Windows Virtual PC” is the virtualization program that allows you to create and run virtual machines on Windows 7.  “Windows XP Mode” is a free pre-configured Windows XP virtual machine.  “Windows XP Mode” is not available for people running Windows 7 Home editions; but these users can download Windows Virtual PC and use a separate (fully licensed) copy of Windows XP to create their own Windows XP virtual machines and get all the functionality of Windows XP Mode.

    You can download Windows Virtual PC directly from here: http://www.microsoft.com/downloads/details.aspx?FamilyID=2B6D5C18-1441-47EA-8309-2545B08E11DD

  • URLStringGrabber - Grab URL strings of Web sites from Internet Explorer – (freeware) – NirSoft.  Nir has a brand-new utility that will scrape all opened URL references out of open Internet Explorer (only) sessions.  You can then export some/all of the URL’s for later analysis in a application that supports text, csv, html, or xml file formats.  Might be a handy tool to document/log/analyze the linked content on web-pages during a malware study.

Cheers.

--Claus V.

D-Link DIR-655 Updates

I noted in last week’s post while looking at the TonidoPlug Linux Home Server, NAS review by Paul Stamatiou.com that I never ended up falling in love with the D-Link DIR-655’s SharePort feature that came with that wireless router. 

I had originally planned to hook up a big USB drive for some NAS action but it just was too clunky for my taste at the time the router was originally deployed. 

While working on that post element, I dropped over to the D-Link product page for the D-Link Xtreme N Gigabit Router (DIR-655) and found that they had released updated drivers as well as SharePort application software.  (Look under “Support Resources” then “Additional Downloads” or “Firmware”.)

Updating router/switch firmware can be easy-quick or bad-difficult.  Typically I don’t bother if all is running well.  However, since it is used as a wireless access point for our home systems, it would be poor security to not ensure the router is fully updated/patched.

So this morning I decided to pull the pin.

Firmware First

Note: firmware upgrade done from my system that was hard-wire connected to the router, NOT over the Wi-Fi link!

I was running firmware version 1.21 back from 11/2008.  As of this post, the current firmware version is 1.34NA from 05/2010.

I logged into the router and used the internal tool to check for newer firmware updates but it said my 1.21 version was the newest.  Liar.

I downloaded and unzipped the newest firmware version to my hard-drive.

I then proceeded to obey the interface warning “Note: Some firmware upgrades reset the configuration options to the factory defaults. Before performing an upgrade, be sure to save the current configuration from the Tools → System screen.” which I did, appending the default filename with today’s date.

Then I uploaded the previously unpacked firmware .bin file, it took just under a minute to upload.

Then the update was applied, which took another 30 seconds or so.

I got a “success” notice and the router was requested for reboot.  Done.

When I then re-logged into the router, I found it had, in fact, reset the configurations to the factory defaults, including the “blanked” Admin password.  I then quickly uploaded my backed-up config file and reset the router again. Done.

All the settings appeared to have been brought back in with no issues…except for the time/date which was off.  I told it to use my Windows system settings and all was well.

Whew.

Only later doing additional research on this post did I find reports of some users unable to do a 1.21 to 1.34 firmware jump, and that the saved configuration file settings didn’t work. So, YMMV.

D-Link does some funky javascript work, so it is very difficult to direct-link to any of the helpful pages. However you might find these few useful.

SharePort Second

The PC SharePort Utility is now versioned at 3.0 with a 03/2010 release date.  I think the major part is that it has been set to delay launch for 15 seconds after Windows startup to allow the Windows Firewall to get started up and settled down before attempting to connect to the router.  Sounds like a good plan.

I’ve not really needed it yet, so I’ve not bothered to install it on my Win7 system yet.  I’m probably going to decommission our aging SFF desktop system and use the 500GB drive in it with an external USB-based drive enclosure I have.  Then maybe I will hook it up and use it as a backup/archive source via SharePort.  Not sure.

The updated documentation PDF for SharePort also available from the download page seems to say nothing about Windows 7 compatibility, much less x64 flavor support.  However, there were a number of forum posts that seemed to indicate no Win7 x64 compatibility issues existed and others had got it working.

When I finally do so, I will post an update.

Cheers.

--Claus V.

Sunday, July 04, 2010

Fourth of July Fireworks

It’s always been a real joy going to the hometown Fourth of July gathering.   You know, driving around like a predatory shark, looking for a parking place, making the long-hike out to the commons and staking out that last bit of brown grass in the baking sun and coastal humidity, being assaulted by the hawkers of dime-store glow-in-the-dark bands, spinners, and glow-sticks. Slapping down mosquitoes. Listening to the kids whine as everyone awaits the fireworks.  Trudging into line to get a cool beverage and deep fried snackage.  Waiting more.  Finally the firework display; loud, booming, thumping, and all is forgotten under the rainbow of colors and acrid smell of black powder.  Awe.  Then it is over.  And in the drifting haze of post-lift-charge smoke, for just a moment, you stand with your family and a community on the town lawn, unified as a local body, within a beautiful union.  America the beautiful.

Then you hike back to where you probably think you parked the car, wait in the out-flow traffic for another thirty minutes, and go to bed tired, sweaty, and itchy from the grass and insects.

This year?  A Capitol Fourth Concert on PBS. High-Def and in the comfort of our own home.

It’s the “New” American way, baby!

Enjoy these 4th of July poppers….

  • TightVNC 2.0 Released – this new version has been re-coded from the ground up to specifically play nice with Windows 7 (32/64).  See the Download TightVNC and get yours flowing.  I’ve already done two upgrades this morning from the previous version.  Both were done on Win7 Ultimate systems (x64) and the installer put the new version right on top of the current one, retaining all the settings.  Sweet like southern mint tea on a hot summer day.
  • Free RDP manager – Royal TS – 4sysops swears in this intro that the free RDP manager Royal TS is worth checking out.  Compare to the previously mentioned Microsoft Download: Remote Desktop Connection Manager (RDCMan) as well as mRemote and 2X Client Portable.
  • Free Windows Error Reporting (WER) viewing tool – AppCrashView – 4sysops also reminds us of Nir Sofer’s handy AppCrashView freeware utility for troubleshooting.
  • Analyze application failures the easier way with Dependency Walker - Ask the Performance Team provides us another application crash analysis tool.
  • Case of the Unexplained 2010 – TechEd video presentation by Mark Russinovich is available to watch or download in four formats.  Always awesome and always educational in the elite ninja skills of Windows troubleshooting.  See also: Pushing the Limits of Windows and Windows 7 and Windows Server 2008R2 Kernel Changes presentations as well.
  • VideoCacheView is updated to work with downloaded temporary .flv (flash) files of Firefox 3.6.4 – Nir Softer shares some of the behind-the-scenes work on this latest version.  VideoCacheView can be used to find and review and save cached video files from browsing sessions.
  • Network Monitor 3.4 has Released! - Network Monitor – Microsoft has released the final build of Network Monitor, with updated parsers as well.  I’ve used the latest beta version for a while and enjoyed it.  So now go and grab the stable version.  Download: Microsoft Network Monitor 3.4
  • ImDisk Virtual Disk Driver -version 1.3.0 – another update released June 7th in this virtual disk driver for Windows systems.  This update now ships with a “…new registry setting DisallowedDriveLetters that can be used to specify drive letters not allowed to be used for ImDisk virtual disks. It should be a string value containing drive letters to disallow. The value should be created under the key HKLM\SYSTEM\CurrentControlSet\Services\ImDisk\Parameters.”   Olof Lagerkvist rocks.  It is my fav virtual disk driver/mounting app; for good reason.
  • Customize Task Manager colors with Task Manager Modder – Download Squad found a neat little utility to add some jump-n-jive to your task manager; Task Manager Modder.  You can change the colors at will, and then reset them as needed. I always just set Process Explorer to be my new default Task Manager, but some folks like the original.  now you can really make it your own.  ~ Windows XP SP3 x86 and Seven RTM 7600 x86/x64
  • Windows Live Essentials Wave 4 public beta is out – ArsTechnica review and Windows Live Essentials beta – Microsoft download source.  I’m using this new beta version to blog with right now.  It does follow the ubiquitous Windows Ribbon format now, but despite the fact it doesn’t seem as intuitive to use as the previous versions, the controls are much easier to get to, particularly for font and paragraph formatting. It’s got lots of little things I’m still discovering like the fact that if I copied a HTML link code and click the “Hyperlink” button, that copied code is automatically pasted into the correct field of the dialog box.
  • Review: $99 TonidoPlug Linux Home Server, NAS — PaulStamatiou.com.   I never ended up falling in love with my D-Link DIR-655 D-Link SharePort that came with that wireless router.  In my mind I would hook up a big USB drive for some NAS action but it just was too clunky for my taste.  I never bothered to see if they updated the drivers. (yep—firmware and application updates present in 2010…)  So Paul’s review of the $99 Tonido Plug NAS device was quite interesting. Though I wouldn’t use it for any of the Web applications (he wasn’t much impressed either) the support provided for storage to a USB-connected drive was pretty clever.  So for a no-frills way to deploy a cheap and simple NAS unit, it might be worth looking into.

Setting Dad up for Failure

Dad’s still running his spanking fast HP Pavilion a6000-series Vista system.  It’s been rock-solid for him since Fall 2007.  No issues at all.  He’s not quite interested in jumping up to Windows 7, but I think it is time to roll it over to Win7 x64.  So the planning begins.

In the meantime, little bro was up there and discovered (among other things) that Dad’s backup plan has been to manually copy particular files over to a bitty flash-drive from time to time.  Oh bother.

So he started to get System Backup set up for him, but discovered that the Vista version Dad has is a far and sad cry from that in his Windows 7 Ultimate edition.  So he punted and told Dad to pick up a USB external hard drive and give me a call.

I encouraged him to find a 1 TB Seagate drive that came with FreeAgent for a OEM solution.  I use that on my work laptop and it is nice to not worry about.  So this might be an out of the box solution.  He did come home with a 1 TB something USB, but I’m not clear on the brand yet.

So we then got talking about different backup solutions; he thought he wanted a full system backup solution based on what my brother runs.  That would be good.  I also discussed how that differed from scheduled file backups of particular folders containing critical user-data and whether a incremental or differential plan would be better.  His eyes began to glaze over quick.

So I think we will do both; a full system backup solution for system restore running on a weekly (?) schedule.  Then a file/folder incremental/differential backup solution on a every other day schedule.

I’m really that concerned about the system backup solution.  But the daily backups need to be saved in a format for easy per file/folder extraction and access rather than some proprietary archive format.  That will make it much easier to recover just what we need rather than depend on the same software to do the restoration lifting if we don’t want to.

Here’s what I’m considering for both solutions:

  • Paragon Backup & Recovery Free Edition – Really full featured in terms of looking like it could support both needs (system and files/folders).
  • Comodo Backup – Also seems to support both system and file/folder backup options.
  • Macrium Reflect FREE Edition – The Free edition seems the way to go only for system backups.  Good but not as many options.
  • EASEUS Todo Backup  -- Seems to be a system backup solution, but will let you mount the image file to explore/copy as needed files off.
  • Personal-Backup – This would be more for the specific file/folder (user data) backup needs.  I like the fact that the backups are placed in Zip files for easy access/extraction/restoration.  Lots of features.
  • Cobian Backup – Seems to be a perennial favorite with folks.  New version 10 is now out and supports Windows XP-7 in both x32/x64 flavors.
  • GFI Backup Home Edition – Nice home-user friendly wizards to set up backups, as well as restorations based on Zip formats even without the program being present.  Nice.  Program settings for various common apps are able to be easily backed up/restored.  Takes advantage of the Volume Shadow Copy Service to make backup of files still in use.
  • Sync & Backup Tools (freeware) – a few more offerings from an older GSD post.

And in all this musing, Download Squad found Redo Backup based on the xPud Linux Live distro: Redo Backup is a fast, easy way to image your hard drive.

Of course, that is system backup based on a drive imaging strategy, very similar but a bit different from what we are trying to get Dad set up with.  If that was the case we’d be probably looking at an all-week training session on drive imaging and cloning solutions and ImageX or Clonezilla with him.

We don’t need those kind of fireworks…

Fortunately for everyone involved, I think one or two of the previous strategies will more than suffice.

Happy 4th,

--Claus V.

Saturday, July 03, 2010

TeamViewer and WinPE: “Off-Line” Remote Support

filed under the “it works for me…” folder.

I’ve covered remote support tools (targeting family/friend support) before here.

As well as quite of bit of Windows Remote Desktop musings.

…to name just a few.

while they all work very well in their own ways to provide remote desktop support to a family member while their system is up and running there is just one problem with all of these applications.

How are you supposed to remotely assess/help your buddy/loved-one across the country if their Windows system has tanked and won’t run Windows?

Wee bit of a problem ‘eh?

So I wondered and came up with the following pre-problem deployment activity;

  1. Build a custom WinPE boot device; either a Sexy USB Boot (Win PE style) or a CD/DVD based one: Custom Win PE Boot Disk Building: Step Four – Pulling it all together and Custom WinPE Building: Post-Script and PE 3.0.
  2. Seed it with lots of great Portable SysAdmin Tools.
  3. Toss on Devio: Remote drive access and acquisition for good measure to enable access to the physical drive remotely…maybe…
  4. Figure out how to get a remote connection tool working on it in the WinPE environment.

So when my relative calls me in a panic because their system is stuck in a BSOD or something heinous, and won’t even boot to the OS we just need to

  1. Do a off-line boot of the system using the WinPE USB/CD/DVD,
  2. Fire up the embedded remote connection tool,
  3. Start our remote connection session joining,
  4. Go to town with the diagnosis and (possible) repair response.

No problem, Right?

Wrong.

Testing of ShowMyPC (my first choice) didn’t get me much forward progress in running under WinPE.  I’m sure it could be done, but I lost energy tracking down all the dependencies trying to get it going.  That’s why I settled on TeamViewer.

As an added bonus, TeamViewer supports mulit-monitor displays and has a nice integrated chat/file-copy method.  But the real winner is that I can easily re-scale the remote system display so I can zoom in better that ShowMyPC seems to handle display mismatches.

Try as I might (though not really that hard), I was not able to get TeamViewer Portable running “out of the box” on my custom WinPE builds.  I seem to believe that it would do so in a “stock” WinPE base build…but that wasn’t really what I was after.  I wanted it operational in my custom WinPE (GUI) builds.

I knew that the free TeamViewer version is actually very similar to ShowMyPC.  If you download the single exe installer file and launch it, you will get two options: “Install” which will install it proper on the system…nice but not helpful in a WinPE deployment, or “Run” which will unpack and launch it similar to ShowMyPC.

I set it into my WinPE build and went to work with the “Run” method.  Only in WinPE, it kept erroring out.  More dependencies.

But this time I was patient and got it working by doing the following things:

  1. Made a folder in my WinPE building process called “TeamViewer_PE”
  2. Place the downloaded TeamViewer executable into that folder.
  3. Search a mounted WinPE WIM file for the following files: “avicap32.dll” and “msvfw32.dll”
  4. Copy them both into the same folder with the executable.
  5. Add a batch-file that I named “Teamviewer Launcher.bat” to the folder.
  6. Edit the batch file so it contains the following three lines.  Note your drive letter for the WinPE media source may differ from mine below where my USB/CD’s seem to always end up on the E: drive. Adjust accordingly….
    1. Copy "E:\helpers\TeamViewer_Portable\avicap32.dll" x:\windows\system32
      Copy "E:\helpers\TeamViewer_Portable\msvfw32.dll" x:\windows\system32

      Teamviewer_Setup.exe

  7. Save the modified bat file.
  8. Roll up your WinPE build after you’ve done any additional tweaking or adding of critical utilities and/or anti-virus/malware tools.

When needed, have your friend boot their system with the WinPE boot tool you have pre-staged with them in advance, then walk them through to find where you stowed the “TeamViewer_PE” folder.

Have them launch the “Teamviewer Launcher.bat” file.

It will copy the two required .dll files into the X:\Windows\System32 folder, then launch the executable TeamViewer.

Tell them to use the “Run” option.

TeamViewer should launch and then get their connection code and password code, enter them into your local TeamViewer session, and you are connected!

Works fine for me in my own custom/stock WinPE (3.0) builds and is a great way to leverage the power of both a WinPE off-line booted Windows system for work remotely.

Note: you might also have to adjust your WinPE scratch-size space for better performance.  See this GST post WinPE and DISM/PEimg to boost Scratch Space (Ram Disk).

Happy WinPE building!

--Claus V.

GSD Hurricane Tracking Links – 2010

Hurricane Gordon

CC attribution: Public Domain. NASA via pingnews on flickr.

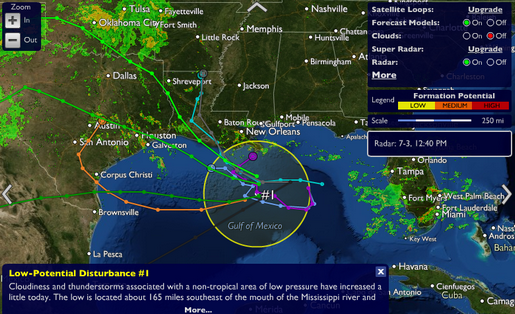
OK.  We in Houston appear to have survived being drenched by the fallout from early-season opener Alex here in 2010.  Despite making landfall in costal Mexico a bit south of Brownsville, Texas, the far-reaching bands have been bringing feeder-bands of rain for the past 3-4 days.  This Saturday is the first glint of sunshine.  Although there is currently a non-tropical area of low pressure sitting off the mouth of the “Mighty Miss” looking to slide into our area over the next few days.  Oh bother.

With predictions already coming true of a particularly active and strong 2010 hurricane season, it’s time to refresh the GSD hurricane tracking links for 2010.

Bookmark ‘em all!  (Or al least this post!)

Gulf Coast Watch List

So here are the hurricane links I am watching at home and work, to track the impending winds. Listed in order of my personal preference…

image

  • Stormpulse / Hurricane tracking, mapping - If you like dark-themed, special-op center techno-sites, this is the one for you. The site has a lot of information and can be customized in extra data inclusions on the chart. What really makes this one cool is that it has a “Full-Screen” mode that displays as much detail as you want for the storm-track on your monitor.  It provides a standard storm-track model, but you can select to include a bevy of additional forecast models if you want to really psych yourself out. Loaded up in Google Chrome or Chromium coupled with a nice dark Google Chrome Theme it really stands out projected on the wall of the incident command center.
  • Google Earth – What? Yep. Google Earth is now coming in to 2nd place in the list this season.  Couple that with the wicked-awesome Google Earth Network Link For Entire Basin (direct download link) KMZ files provided by the Tropical Atlantic website and you are ready for some major storm-path modeling.  When a storm comes, you can also go to the specific storm page and download/use the KMZ files for just that storm as well.  Once you download the file, be sure to save it “permanently” in your Google Earth preferences so it will be available and “updatable” with the latest data when needed.
  • Tropical Atlantic: NHC Model Data for Tropical Storms – TropicalAtlantic beta – For folks who need to have more than one storm-track model.  Look at the top of the page to select any current storms.  Then you can select either the “in-browser” Google Maps mash-up or the Google Earth TMZ builds.  Additional NOAA summary of storm-track models. Also, Tropical Atlantic: Information About Atlantic Hurricanes – main-page. 
  • SciGuy Blog – Chon.com’s Eric Berger - Eric continues to faithfully provide Houstonians and neighbors beyond his outstanding details, commentary, live chat-sessions, and analysis of all science and  prognostication tropical.  Highly recommended as a filter of reason and temperance in a media-market filled with over-hype, smashing graphics, and fear-factor extremes. Besides that, you can count on Eric to provide great meteorological linkage to excellent source material like this GFS global model or this the European model.  It’s a must-follow/must-RSS feed blog for all Texas Gulf Coast residents. Period.  (see also Jeff Masters’ Wunder Blog : Weather Underground).
  • IBISEYE.com -- Your Atlantic Hurricane Season Tracking Map Source – An awesome site that mashes up tracking data on hurricanes and points of interest, along with Google Maps.  Heavy on the JavaScript but makes up for it in pure visual delight.  Easy enough even the “old-folks” can understand.  Not only are hurricanes and projected paths displayed, but also counties are added as they fall under various storm watches and warnings.  Zoom in/out for more detail.
  • Hurricane and Storm Tracking - Terrapin's site remains a dear favorite. It is lean and simple and allows for quick location of information without lots of graphic overkill. The storm-track plots come in two flavors, a simple historical and future projection track that is static as well as a java-based animated one. Loads fast and updated as new forecasts are posted.
  • National Hurricane Center - This website maintained by the National Weather Service is my number two choice. Lots more linkage on the sidebar for hurricane related topics and preparations. The main page has links to a number of graphics and advisories.
  • (NHC's) Atlantic Graphical Tropical Weather Outlook - A "beta" sub-page of the site listed above. This is pretty cool. Any current tropical systems are overlayed on a satellite image with an icon. Hovering over the icon pulls up a quick update view. Clicking on the update popup then takes you to the system's detailed page.
  • Moreweather.com -- Tropical Atlantic Weather Page - T-Storm Terry Faber has created a great hurricane system page here. Not only does it have lots of links to any active systems, but it also contains links to radar and satellite images, many in great details and high resolution. The hurricane tracking maps and projections are there, of course. T-Storm Terry also provides links to other sources of information as well as historical data on previous storm systems.
  • Tropical Weather : Weather Underground - This is a fantastic site that has the widest range of linkages, maps, images, models, and everything. Just about the only thing it doesn't provide is winds blown into your face through the monitor. Which is why I put this at the bottom and not the top: there is just so much information it overwhelms.
  • Oklahoma Weather Lab | Hoot - Models: GFS Model Upper-Level Wind 850mb provided us great forecast models of the high/low pressure zones and ridges leading up to Ike’s eventual landfall and really helped us understand the forces driving its path.
  • Atlantic and Caribbean Tropical Satellite Imagery - Satellite Services Division / Office of Satellite Data Processing and Distribution and Gulf of Mexico Imagery - Satellite Services Division / Office of Satellite Data Processing and Distribution from the NOAA.  Special thanks to GSD frequent commentator “Bozo” for sharing this great source of satellite images from NOAA with me last year.

Local Winds

For local Houston area facts and updates, most of the local news stations have their web-sites powered up.

Even More Weather

I have found these additional links pretty cool:

Road Kill

Again as it bears repeating, you just don’t want to be caught off guard when one of these comes knocking at your door.

Ike_Bad

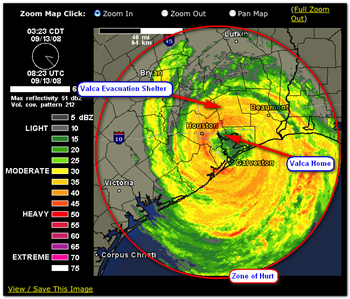
Ike radar image captured by Jim Thompson of jimthompson.org

--Claus V.

Firefox 4.0b2 – “Official” x64 Bit Edition Available

…for the brave and daring only!  These are not necessarily “stable” things by any means.  You’ve been warned.

OK…first things first…x64 bit versions of Firefox have been kicking around in the wings for many, many years.  However none of them have been “mainstream” or really official builds.  Just quiet labors of love.

I’ve been running the latest stable builds of Firefox 3.6.6/7 now with no issues on my x64 Windows 7 system.  And though I’ve had a long history here at this blog of playing with the Minefield/beta versions, I’ve really been relying on the stability and compatibility with add-ons that the stable builds provide.

That said, I still keep some portable versions of the Minefield/Nightlies around just for piddling.

I was recently reading this post, A Look At Firefox 3.7a6pre (Minefield) over at The Firefox Extension Guru’s Blog and was impressed enough by the well-organized list of items detailed by the Guru in 3.7 that I decided to go ahead and update my playbox builds.

So I hopped over to Mozilla Developer Preview, Portable Edition 3.7 Alpha 5 and Alpha 6 Pre Released (Firefox Preview) at PortableApps.com and downloaded the nightly build of Minefield 3.7 Alpha 6 Pre.

What these do is pretty clever, they extract the portable structure and helper files, then access/download the actual Firefox package directly from Mozilla and extract it into the correct folder.

However, for some reason, that second part kept failing and it couldn’t download the actual build.

No biggie.  I’ve been rolling my own portable builds of Firefox for a long time; grand stream dreams: Build your Own: Firefox 3 (alpha/beta) Portable.

So I hopped over to the Index of /pub/mozilla.org/firefox/nightly/latest-trunk and prepared to find the firefox-4.0b2pre.en-US.win32.zip file to download and unpack, then manually seed the %\FirefoxPortable\App\Firefox folder with the contents of the extracted “Firefox” folder from the zip file.

Only…what’s that lurking at the bottom of the list?  Oh my!

firefox-4.0b2pre.en-US.win64-x86_64.zip

So, I downloaded this one instead of the x32 version, unpacked it, and seeded the portable Firefox structure with this instead.

When launched I was greeted with the familiar Firefox 4.0 “pre” interface.  But what lay underneath?

A quick check with Process Explorer showed the story; 64-bit execution, baby.

image

Some observations;

  • no matter how many tabs are open, they are still hosted in a single process, unlike Chromium and IE8.  Opera and Safari also still seem to be using a single process to host multiple tabs/pages.
  • Memory usage seems fairly low…although I wasn’t using it with any additional extensions.
  • It seemed stable…but sometimes it temporarily “stalled” when dragging it around the desktop.
  • Just because it is x64 doesn’t necessarily mean it is any “faster” than the x32 bit versions.
  • No x64 bit Flash player…yet.
  • I’m not aware of many x64-bit add-ons.  Not sure how x32 bit add-ons will impact x64 bit Firefox.
  • Depending on your system, you may need to also install the Visual Studio Runtimes for x64 which you can grab here.  ( I did not as my system was already prepped with them from some previous application download/configuration.)

All that said…it is very cool to see this “official” x64 bit version of Firefox kicking around and I will be playing with this one as much as I do the Google Chromium Nightlies (which I like very much despite the lack of a bookmark sidebar…).

Even More

Rolling your own portable x64 Firefox version

This has been covered before, but just in case you don’t want to skip around, here is how you can build your own “portable” version of a x64 Firefox nightly build for your Windows system.  I really prefer using these versions so I can run them along-side my current “stable” build with no ill effects or getting the add-ons all mucked up together.

  1. Download the PortableApp Minefield launcher package Minefield, Portable Edition 3.7 Alpha 6 Pre Nightly which includes the launcher and portable Firefox structure files.
  2. Run the executable, and select a location to “extract” the files to a "FirefoxPortableNightly" folder location.  I used my system Desktop, but you pick wherever you wish.
  3. You will likely get a “The installer was  unable to download Current Minefield Trunk Build…” error dialog box.  That’s great.  (Really!).  Tell the error box “OK” and keep going.  All we needed was the launcher and portable folder structure extracted for us. And that should have been accomplished before the error.
  4. Download the latest nightly (Minefield) trunk release.  Look at the bottom of the  list for the latest firefox-4.0(something).en-US.win64-x86_64.zip file version!  (Note the (something) name will change as new builds come out.)
  5. Extract this file somewhere on your system.
  6. Go to that extracted folder location and inside find the “Firefox” folder/contents.
  7. Copy that "firefox" folder and contents.
  8. Now browse to the the  \FirefoxPortableNightly\App\ subfolder created in step #2 above.
  9. Paste the folder you copied in step #7 over the “Firefox” folder found in step #8.  It is OK to overwrite/replace anything it might find in the process.
  10. Run the FirefoxPortable.exe file in the FirefoxPortableNightly folder and away you go!

As previously noted, you might also find you need to install the Visual Studio Runtimes for x64 which you can grab here.

Easy!

Bonus Tip: Running Multiple Versions of (portable) Firefox concurrently

One of the drawbacks to PortableApps Firefox is that it balks at running concurrent versions of Firefox.  So typically you can’t do a side-to side run of x32 bit and x64 bit Firefox.

However, if you create and add a custom “FirefoxPortable.ini” file to the same location as your “FirefoxPortable” executable launcher, you can do so.

  1. Browse into your \FirefoxPortableNightly\Other\Source folder and find the “FirefoxPortable.ini” file.
  2. Copy it.
  3. Paste it into the \FirefoxPortableNightly folder.
  4. Open it in Notepad or other other favorite text-file editor.
  5. Find the line with “AllowMultipleInstances=false” and change the “false” to “true”.
  6. Save the file.

Do this for each/all of the PortableFirefox versions you wish to run at the same time.

Now when you launch your x32 and x64 versions of PortableFirefox, you can run them concurrently.

image

For more tips with this file, and illustrations, see the great guide: Customize Your Own Portable Firefox Six Pack – over at Lifehacker.

Happy x64 Firefox surfing!

--Claus V.