Saturday, February 09, 2008

Firefox 3 Security Blocker: Going In Deep

I've been using Mozilla's "Minefield" nightlies as my daily browser at home now for the better part of two weeks. These are the iterations that will eventually become the final Firefox 3 release.

Major issues with the Places bookmark handling, while not fully fixed, have been resolved enough to allow me to be comfortable with regular usage.

Only last night I ran into an unexpected "problem" and it is really frustrating me that I can't get more information!

Scanwith Saga

One of the websites I like to check in at periodically is ScanWith.com. This simple site provides links to freeware and $-ware software that is geared towards system-scanning. Process scanners, anti-virus scanners, malware-scanners, etc. While I don't download the files from this site (rather I go to the developer's site) it provides a great all-in-one stopping place for the latest and greatest in this class of tools.

So Friday morning I was doing a quick link-check for new utility leads before work and the site loaded great.

Friday night, after work, I fired up Firefox 3 (Nightly) and was hit in the face with this:

ScanWithBlocked

Apparently, someone thinks that ScanWith is an "attack site."

Bummer.

But why? And is it true or not? Have I put my own system at risk in my past visits?

Oh bother!

Claus has questions and he's out to take down names!

First Things First: Assessing the Threat

The first thing that I noticed was the frightful language and lack of options on the displayed page (Mozilla feature sample link here).

Notice there is no link here to allow you to click-through, despite your better judgement. That's normally a good thing, especially if your pc is used in a shared-user environment.

There are only two links: the "request a review" link which takes you to StopBadware.org.

Here website owners can register and plead their case to the courts.

However, despite all my attempts and searches through the "Clearinghouse" I could not locate any information on why this site got black-listed. Nothing. Nada. Zilch.

The only other link available on the site is the panic-soothing "Get me out of here!" button. That returns you to your browser's homepage.

There is no way to tell Mozilla that you wish to pass-through to the site anyway. You just can't do it.

If a site is blocked, it's blocked.

Just for kicks, I cross-checked ScanWith's URL against McAfee's SiteAdvisor for the site. It comes back clean and gets positive marks from this trusted anti-virus company. Long searches on Google turned up no additional information reported by other users.

I also left-clicked the icon to the left of the address-bar. In Firefox 3 this gets you a little drop-down mini-window that gives you some site-security information. If you want more, click the "More Information" button.

I did. While helpful, I suspect that the site's lack of supplying owner information and the fact that the connection isn't encrypted isn't what caused the alarm. This is a nice feature, but could be much more informative.

Second: The Workaround - It's all or nothin' baby!

Because there are no options at all here on the warning page to "whitelist" the site manually, there is only one option to get to the site(s) that are being blocked.

On the menu bar, go to Tools > Options... > and click on the Security icon at the top.

Now uncheck the "Tell me if the site I'm visiting is a suspected attack site."

Apply the changes and re-click.

You're in!

But now you've turned off the global-protection setting for this feature. It's not entirely clear to me, but I am pretty sure that you have also just turned off the anti-phishing feature also built into Firefox 3. So now the doors are open!

(Correction: as Asa Dotzler kindly points out in his comment, turning off the "attack warning" feature indeed does NOT turn off the anti-phishing protection in Firefox 3. In Firefox 3 there are two different control options as seen in the screenshots below. Firefox 2 only has an anti-phishing protection option so it wouldn't alert on an "attack designated" website, regardless. Thanks Asa!)

A Mozilla Dr. Jekyll and Mr. Hyde?

Actually it isn't really a "new" feature. Firefox 2.0.0.x also contains the functionality.

In Firefox 2.0.0.x menu-bar, go to Tools > Options and then click on the Security icon at the top.

Notice the options are very similar. You have the option to "Tell me if the site I'm visiting is a suspected forgery" and either "Check by using a downloaded list of suspected sites" or "Check by asking [Google] about each site I visit."

Notice below that I do have this feature enabled in Firefox 2.0.0.12 on my system.

FF2sectab

As I do in Firefox 3.0.0.x (Minefield nightly)

FF3sectab

However, when I load ScanWith.com in Firefox 2, it loads just fine with no interception or warning messages. When I load it with Firefox 3.0, it gets blocked.

The difference? Different download lists!

(Edit: Actually, this is true, but as Asa pointed out I'm comparing apples and oranges here. FF2's list is geared soley for checking for phishing sites. FF3's list (as I break into futher down) differentiates between "attack" sites and "phishing" sites. So this easily explains the differences in website blocking behavior I'm observing between the two, even though the lists are coming from Google.)

Because I am using the one from (presumably) Mozilla in 2.0 (and not downloading Google's) I'm cool. Because Firefox 3.0 uses Google's black-lists, "No soup for you!"

(Even more curiously, when I did toggle the "Check by asking Google..." option in Firefox 2, the site remained unblocked. Maybe I'm not waiting long-enough for the Google-list to be updated after toggling it on? I really don't know.)

More blockage screenshots: Firefox 3: Suspected Attack Site Screenshots « RJO Blog

Mozilla and Google and StopBadware...Sitting in a tree, k-i-s-s-i-n-g....

Wikipedia has some information on the relationship between Mozilla and Google for their anti-phishing/attack filtering:

The release of the anti-phishing protection in Firefox 2 especially raised controversy. By default, anti-phishing protection is enabled, based on a list that is updated by downloads to the user's computer about twice an hour from Google's server. The user cannot change the data provider within the GUI, and is not informed who the default data provider is. The browser also sends Google's cookie with each request for update. An additional, explicitly opt-in security feature has been added to recent builds by the Mozilla Foundation. This anti-phishing feature provides live protection by checking each visited URL with Google.

And the relationship between Google and StopBadware is pretty clear as well, Google's Webmaster Central blog: Better badware notifications for webmasters.

In the fight against badware, protecting Google users by showing warnings before they visit dangerous sites is only a small piece of the puzzle. It's even more important to help webmasters protect their own users, and we've been working on this with StopBadware.org. A few months ago we took the first step and integrated malware notifications into webmaster tools. I'm pleased to announce that we are now including more detailed information in these notifications, and are also sending them to webmasters via email.

The post comments were quite interesting to read and seemed to reflect some issues with getting "un-blacklisted" and the impact this event has on site-ranking.

It appears that the general process for getting tagged and blocked is this:

  1. Google uses an undisclosed and proprietary method (magic?) to locate badware on websites.

  2. Google passes this information to StopBadware.

  3. Google adds a warning under the search-results links for sites it tags.

  4. Mozilla's Firefox 3 downloads (periodically) updated lists from Google's servers and these are folded into the user's browser for protection.

Here is a current Google search result (as of this post's date) showing Google's identification on ScanWith.com.

googletag

You can still click through to their, if you are interested and not sufficiently frightened.

In theory, the website owner finds the badware on their page (embedded in the page-code or hosted for download), cleans up their webpage/website, petitions Google and StopBadware, and is released from the black-lists. More on this in a bit.

Pause for Review

So, at this stage of the game I had figured out that depending on which version of Firefox I was using, I was going to see different results. That the blacklist was provided by Google, and that any attempts by me (the public) to assess for myself what the threat was and make an informed decision to continue or not had been removed from my control in (this version) of Firefox 3 (Minefield).

So now I was OCD locked-on to this issue.

I had to know, what is going on under the Mozilla hood and could I manually "un-blacklist" a site?

Get out the Tools!

Out of curiosity, I decided to see if, perhaps, I could locate the file that was being checked against to see if a site is blacklisted.

I fired up Microsoft Sysinternal's Process Monitor and set a filter to exclude all results except the process firefox.exe.

I swapped over to Firefox and clicked the bookmark for Scanwith.com.

I then toggled back to Process Monitor and culled through the results. I pretty quickly located a file called "urlclassifier3.sqlite".

Only trouble was, it wasn't viewable in my Windows Explorer file list at the location claimed.

So back to Process Monitor. I right-clicked one of the lines with it listed and selected "jump-to."

Bam, a new Windows Explorer window opened up and I found the file buried in a super-hidden "OfflineCache" folder in my Firefox/Minefield profile folder.

Score!

Now. What goodies/baddies are in here?

The file-extension told me that it was a SQL "lite" database file.

I'm down with Access databases, but SQL isn't something I'm knowledgeable about. Some quick web-searching located what I needed: About SQLite.

Turns out it is basically an embedded SQL database engine which contains all the tables, indices, triggers and views..all self-contained in a single file. I can really see the benefits of using this from Mozilla's standpoint.

Unfortunately (for me and other prying novices) working with it demands knowledge and interaction with it from a command-line level. I'm pretty impatient. Anybody got GUI?

Yep: SQLite Database Browser. This freeware tool allows one to "to create, design and edit database files compatible with SQLite. It is meant to be used for users and developers that want to create databases, edit and search data using a familiar spreadsheet-like interface, without the need to learn complicated SQL commands." Awesome!

I downloaded the file from SourceForge and unzipped it. It is a single EXE file with no need for installation, click and run. My kind of program!

Once running I was able to dive into the blacklist files! Well, kind-of.

Welcome to urlclassifier2.sqlite versus urlclassifier3.sqlite

See, actually the first time I went hunting for urlclassifier3 on my drive, I didn't pay attention to the full path location.

I ended up first working with urlclassifier2.sqlite which I did find plainly in the root of my Firefox (Minefield) profile. This is the same location and file used by Firefox 2 builds.

When I opened it up with SQLite Database Browser I found the following structure:

goog_black_enchash - details on encrypted hash format can be found here
goog_black_url - contains blacklisted URLs of suspected phishing sites
goog_white_domain - contains whitelisted hostnames as determined by Google
goog_white_url - not currently used

When I eventually realized my mistake, I went back and found the correct one - urlclassifier3.sqlite.

moz_classifier - hashed domain and chunk_id's (my current one lists 18453 records).
moz-subs - hashed domain and chunk_id's (my current one lists 18453 records).
moz-tables - contains four names; test-malware-simple, test-phish-simple, goog-malware-shavar (with add_chunks and sub_chunks values), and goog-phish-shavar (with more add_chunks and sub_chunks values).

Turns out that with a bit of work, you can actually and easily "decode" most of the URL data in the urlclassifier2.sqlite file.

John Oberheide and the oiepoie blogs both have fantastic information on the Firefox 2 blacklist file

Here's how I figured out how to decrypt them using John's information:

  1. Using my new friend SQLite Database Browser, I exported both the goog_black_url and goog_white_domain files as separate text files to my desktop.

  2. If opened in notepad or another application, they appear to have a URL-like format, but are unreadable.

  3. The trick here is knowing (from John and Mozilla's posts) that they are actually in a ROT13 encryption format.

  4. If you open either of the exported files in NOTEPAD++ or EditPad Lite (thanks for the tip TinyApps!) both have a "convert ROT13" function. Run that function and there are the URL's in their normal glory! Or if you just want to pick out one or two, use an on-line ROT13 converter,

Explore to your heart's content. I ran a search for Scanwith.com against these lists, and didn't find it. Not that I expected to, as Firefox 2 doesn't block Scanwith.com, despite checking that urlclassifier2.sqlite file in my Firefox 2 profile folder was only minutes old when examined and clearly from Google's own servers.

Making Mozilla Hash

The goog_black_enchash I never could work out how to decrypt. Not that it's a big secret.

I was able to follow the steps provided in Mozilla's Wiki to create several MD5 hashes for scanwith.com. I figured, if I couldn't decode them, maybe I could encode it and compare the hash against those hashes in the list.

So I ran the following URLS through the ropes: www.scanwith.com and scanwith.com the hashing process:

  1. Based on the Mozilla Wiki page I take the current database salt "oU3q.72p" and concatenate it with the sub-hostname string, and uppercase the results, thusly:

    • oU3q.72pwww.scanwith.com

    • oU3q.72pscanwith.com

  2. I then computed the MD5 hash of each item:

    • 55D5ADE94D9C39E4EA9EC58E932EE62A

    • C4590E8D8FABD03ED33F3C4090DE4050

  3. I then ran a search for each of these strings in the exported table, but no hits.

Again, I didn't expect any as Firefox 2 doesn't block the site, so they shouldn't be there.

I wish I could have decoded all the URL's listed in the goog_black_enchash export file. However, I'm not an advanced script-writer or a noobie cryptanalyst. So I was quickly lost following Mozilla's instructions on how to decode the data using base64 encoding, along with the "database salt, random salt, and hostname. You also have to toss some RC4 into this mix (Here is a java-based RC4 tool.) If anyone reading this has those skills and can write something to help, or provide steps for the witless like me to follow, it would be nice.

Why all the Obfuscation?

Simple. No dark secrets; it's just Mozilla's attempt to keep anti-malware scanners from alerting on the bad URL's contained in their database file.

Unfortunately, I was unable to find ANY documentation on the structure and format Mozilla is using for their revised URL checking file urlclassifier3.sql. Too bad for me.

It appears to actually be designed to function pretty coolly. From the very limited information I have, the Firefox browser is able to request small-sized database update "chunks" from Google's server to help with bandwidth utilization on the network. This way it can perform frequent "micro-updates" to avoid some earlier performance issues with this updating process in Firefox 3 (Betas). I'm guessing that the add_chunks are blacklisted URLs being added to the database while sub_chunks are coming in to remove URL's now deemed safe.

I still wonder if it would be possible, were a particular URL to be identified, if someone with enough technical knowledge could go in and, using a SQLite tool" delete the offending record out of the database or modify it. Of course, if I could, then I have no doubts that an attacker could use this as a vector to remove "true" listed phishing/attack site URLS or even falsely seed it with legitimate websites. Probably not really a useful attach vector, but certainly worth considering.

Full Circle - Back to the Beginning

So, by 2 AM this morning I decided I had squeezed all the blood I could get from this stone.

Here's where I leave off with what I know:

Jesse Ruderman 2007-11-17 16:51:06 PST Comment #3

How should the UI for this work?  Should Firefox ship with a predefined list of
phishing/malware site list providers, like we do for search engines? For ones
that aren't on the list, should there be a way for users to add them?

I imagine we could get one or more of McAfee SiteAdvisor, Netcraft, or GeoTrust
to provide their data in the correct format if we offered to add them as
options.

Mike Beltzner 2007-11-20 08:25:50 PST Comment #4

(In reply to comment #3)
> I imagine we could get one or more of McAfee SiteAdvisor, Netcraft, or GeoTrust
> to provide their data in the correct format if we offered to add them as
> options.

You'd imagine incorrectly. We've asked and extended offers to all of those
companies, and been rebuffed.

This doesn't block, but is wanted. The best way to do it, I'd imagine, would be
to allow alternative providers to register themselves similar to how feed
readers and other web apps do, providing the endpoints for the Safe Browsing
protocol. The UI would be a drop-down of available providers in the prefPane.

If we don't get it for Firefox 3, alternative providers can still support
themselves by creating an add-on.

  • At least in the case of Scanwith.com, StopBadware and Google provide no way for the public to find what triggered the alert "attack" ranking blocking the website.
  • My unprofessional review of the site's page-code doesn't find anything alarming. I am curious if any experts could verify this.
  • My "gut" feeling is that there may be one or more programs available for download on the site that could be "potentially" used for ill-purposes/hacking against a system or network. Maybe the availability alone got them hit?
  • StopBadware swears that a site can't be listed in error or for no good reason.
  • Firefox 2's current urlclassifier2.sqlite file doesn't blacklist the site, Firefox 3's urlclassifier3.sqlite file does. Does anyone see an issue with consistency here? Hard to know who and what to trust now.
  • Mozilla doesn't (currently) offer any options for Firefox 3 (Minefield) users to click-through on their own to their desired website. We can only entirely disable the protection globally to get to the site, or leave it engaged and give up or switch to a different browser.
  • Mozilla's own developers have in the past openly wrestled with the philosophic issues around the Phishing/Attack protection design problem:
Warning Dialog UI

The hard part of a feature like this is not identifying phishing pages, but rather figuring out how to present this information to users. With this in mind, Google did usability testing of a multitude of potential UIs. In the process we learned:

  • When a phishing warning is encountered, users have three primary reactions: a strong desire to continue to use the page, a near-panicked desire to get away from the page, and a desire to see the villains brought to justice. In cases where users heeded the warning, they typically also needed a sense of closure, so it's important to give it to them (hence the "report to google" option).
  • We originally showed the warning only when the user began interacting with a problematic page, but it quickly became clear that users prefer we just disable the page as it is loading.
  • Warnings of "suspicious" pages (pages we're not positive are phishing, but that might be) were by and large ineffective. Users either ignored the warning or said they'd prefer us to make a judgment for them, and that they'd trust us on it. Such warnings probably don't give the user enough information to go on; perhaps they'd be more effective if accompanied by a way for users to do a "background check" on the page.

<snip>....This is by no means final; we're still doing testing. Additionally there are obvious branding issues here that need to be considered. But this is the basic idea.

For those of you who have stuck this post out and are still with me, I'm NOT complaining or questioning either Google or StopBadware's mission and efforts to try to keep the web a safer-place for its citizens. God Bless Them for working hard and establishing some sort of review and process to help folks stay safe as they search and surf the web.

Same goes for Firefox. For the most-part, I applaud Mozilla's efforts to integrate a phishing/attack filter on their wonderful browser.

I am strongly complaining about the lack of information than both StopBadware and Google provide to help us gauge for ourselves the specific reason(s) for the blacklist rating provided. As well as the inconstancy in filtering results depending on which of their browsers I use.

I'm not trying to erroneously defend ScanWith here. They may or may not be hosting malware on their site. They may or may not just find themselves blacklisted due to the content of programs they host for download. That's my point. I can't say and no-one seems to be able to or is willing to tell me (and the public at large).

I also regret that Mozilla doesn't have some kind of mechanism in place for me to click-through anyway to get to the website in Firefox 3. Even if it would take a discouragingly painful amount of prompts to do so would be fine (like how Firefox requires me to add some Add-on developer's websites to an internal white-list first when downloading an XPI file from a non-Mozilla hosted website).

I have learned how to view many of the files blacklisted/whitelisted by Firefox 2. I really would like to be able to do the same thing for the ones in Firefox 3's urlclassifier3 file. (Nir, are you thinking what I am hoping for?)

Despite all this, I am pleased that I have now gained an deeper understanding of Mozilla's use of SQLite database files and found the SQLite Database Browser tool. Poking around in additional sqlite files in my Mozilla profiles with the utility provided some interesting information as to what and how Mozilla stores user data. Cool stuff.

More Information on the Mozilla Phishing (and Attack) Protection

If anyone is more familiar with these issues and can leave clarifications or corrections, comments would be appreciated. Just in case I'm out in left-field here singing to myself.

--Claus

Sunday, February 03, 2008

VistaPE WinBuilder 011 - Basic Walkthrough

When I last posted about VistaPE builder, VistaPE Builder Tutorial - Highly Advanced (and Fun!), it was clear that this was a fantastic tool to build a powerful system troubleshooting and utility CD based on the WinPE 2.0 boot disk format.

At its core is Vista.

The version I was using at the time of that post was 008.

It worked great and with a few minor points I had to learn, it built flawless VistaPE disks.

VistaPE Version 11 puts them all to shame.

It is polished, and it is professional.  It comes with a slew of new utilities and programs to (optionally) include in your build,and really looks like a prime-time product.

I got goose-bumps the first successful build I was able to pull off.

But it came with some work and lessons learned.

Time to pass the torch of knowledge to you so you don't repeat my mistakes and pass up using this incredible tool.

The Dread "Black Screen and Cursor of Death"

Starting with version 009 and continuing through version 011, I ran into a BIG problem.

I couldn't get the builds to work.  008 continued to work fine, but with 009 I kept getting a boot error and with versions 010 and 011, I kept getting a black screen and cursor of death.  Happened on both my XP Home and XP Pro systems.  I was getting very frustrated as version 008 which I had tucked away continued to turn out flawless ISO builds.

I reviewed the error logs and there were a lot (21) showing with "FileCopy - Failed to copy."

I spent days on this until I found out that these particular errors are "normal" if you are using the WAIK Developer's kit as your source (which I was) instead of an original Vista setup DVD and happened to check certain build options that call to the Vista DVD disk.  Once I figured those were just (literally) red-herrings, I could turn my attention elsewhere as they are not "fatal" errors after all.  I just needed to ensure I de-selected those script options since I was using the WAIK as my build source.

I was using a NTFS formatted partition (required) as my building volume for the WinBuilder folders. So that wasn't the cause.

Eventually I found a series of forum threads that cleared up the issue with the dread black boot screen and cursor of death for VistaPE Winbuilder: The build-folder (and sub-files/folders) must have a user security permissions object "Everyone" with full rights assigned for that user. 

I have some serious security concerns about this, but I will save mitigation of that risk that until the end of the post.

Turns out that beginning with version 010 (I think) the scripts were modified and unless the files during the build process have full "Everyone" rights, you can build the ISO for VistaPE, but during the boot process, the files that were created don't carry with them sufficient security permissions to allow the boot process to execute.  Thus you seem good at first, but when doing the Vista WinPE 2.0 boot, it dies on a black screen with the cursor present.

Once I worked this out, all my builds worked flawlessly again.

So what do you do?  I'll cover that in a minute (look for Tip #3 a bit below). But for now, if you have XP Pro (or Vista) you shouldn't have any issues setting up the security rights.  If you have XP Home, it isn't as easy.  See my GSD post "Get the Security Tab in XP Home! For Free!" to see what options you will have to consider.

Shall we proceed?

Some Pre-Assembly Required

I will perform this version 011 build walkthrough on a XP-SP2 system.  Mine is a XP Home version.  I have done this quite well on XP Professional and Vista.  There may be some slight differences between the OS versions, but if you understand the concepts, you should be good to go. 

First, the drive partition you are doing your mastering on MUST BE formatted as NTFS.  If you don't know what I am talking about, you might not be at the point of taking on this project. 

I always just do my building in a C:\VistaPE_WinBuilder_v011 folder on the root of my C: drive.

Also, be sure your drive/partition has enough space to build the project.  One GB should do nicely for this base project, but two would be better.  You will be creating an ISO file for the disk so you need that room for it as well as the build files and applications you will be fetching down to your local drive.

First: Get and prep the active components

  1. Download and Install the Windows Automated Installation Kit (Windows AIK), or
  2. If you have a Vista setup-disk (not the same as a system-restore disk), you should be able to use that instead and skip step one above. It is recommended you copy the files on that disk to your hard-drive just for performance improvement in building.
  3. Download and unpack WinBuilder to your NTFS partition.  It is a .rar file format, but most all compression programs should be able to unpack it. If not, just get and use either the free 7-Zip or the more user-friendly free jZip.  I unpacked mine on the root at C:\VistaPE_WinBuilder_011.  Note: I am using the download-link offered for the "Latest stable version 11 (01.01.2008)" on the download page for this guide.  Again, you can actually put the file anywhere you wish, but it must be on an NTFS formatted partition!
  4. Once the main build folder is ready, we must prep the file and folder security permissions.  Right-click on the folder and select "Properties".  Now click the "Security" tab.  Add/Create a user account called "Everyone."  Now select that account and ensure that all the items in the bottom window are checked to "Allow".  Good.  Save, apply, and click on out.

Tip1:  For an added bonus, I now strongly recommend downloading and unpacking the following file handy: GImageX, but it is not required. If you want to skip this, don't worry about it.  See this post ImageX - Welcome to the Imaging X-Zone to see why I think it is a great addition to the project.

Tip2: If you forget for some reason to do this on a NTFS formatted partition, when you run the final build file (virtually or off a burned disk) it will boot to a point but then stop at the following error: "...winload.exe is either corrupt or missing."  That's because you didn't do the building on a NTFS formatted partition. If this is the case find and move your WinBuilder folder and contents over onto one and try another ISO build again.  It should work fine the second time.

Tip3:  If you are completely lost about step 4 about with setting of security permissions, see these related (illustrated) posts from assorted websites:

Second: Get the inactive components

  1. Browse to where you unpacked WinBuilder and run the exe file. (You did remember to set the Everyone account and set full permissions, right?)
  2. The version I am using reports "WinBuilder 074" in the title bar.  If yours is different you probably can still follow the principles outlined here, but some of the references might not exactly match.
  3. Take a moment to examine the window. There are two tabs "Web" and "Download" as well as some mini navigational icons "home," "forward," "back," "refresh," and "stop."
  4. Click on the "Download" tab.
  5. After a moment, the program tabs load.  Click the "Servers" tab and take a look.  I recommend starting out with just the default servers.  Checking others provides additional project scripts for extra building features.  Play with this once you have mastered the basic steps..
  6. On the left hand side, you should now see "Recommended" in a drop-down option box.  If you click the drop-arrow you will see additional projects "basic," "complete," and "beta."  Again, let's leave it on "Recommended" for this build run. Play with the others as you gain experience.
  7. Note that on the info area for this tab (at the top) you should see that you have 44 files selected and about 89.29 MB of data to download. I hope you have a broadband Internet connection!
  8. I like to go in and ensure the VistaPE > Shell > 2-BSExplorer.script is checked.  I prefer this one over the LiteStep interface.  Strictly optional at this point.
  9. Click the "Download" button at the bottom and the WinBuilder will begin fetching the files and scripts needed for your project.  A "Projects" folder will be automatically created in your C:\VistaPE_WinBuilder_011 folder (or whatever you called yours) and the files placed into there.
  10. On the left-hand side you will see the detail elements being ticked off as they are obtained with a download status bar showing the progress on the bottom right hand side.  This may take a while so get up and go spend some time with your loved ones (family, friends, cat, rat, etc.)
  11. WinBuilder should restart when done.

Additional notes:  Once you get the basics of VistaPE building down, come back here and play around on this page. Note that when you select other Web Servers, additional projects or project sub-elements appear.  There are a lot of cool ones so take your time exploring.  Also, under each project should be some "+" signs. You may expand these to see what the projects elements contain in more detail and select them to be individually included/excluded.  Finally, the drop-down box allows you to fine-tune the project with "Minimum," "Recommended," "Complete," or "Beta" levels of element inclusions.  Again, try different options to see what happens and appears.  Unless you start out on the "Complete" build version to begin with, you will need to do the download process again to bring down the additional project scripts and programs.

Third: Into the Crucible!

You should now see that a third tab has been added to our WinBuilder window.  This is the "Scripts" tab.  It has a four-tabbed element screen on the right with tabs for "Scripts," "Paths," "Log," and "Code Box."  Now the fun begins!

  1. Click on the "Paths" tab and set your Source directory.
    • If  you are using the WAIK and installed it to the defaults, browse to the following location using the folder icon next to the blank line: "C:\Program Files\Windows AIK". Or,
    • If you are using a Vista setup disk, you probably should have first copied the setup files to your drive, so point to that location, or the DVD if you didn't. 
    • Note: The Vista disk is not required...the WAIK installation works great by itself.
  2. The "Target directory" is set by default.  I would leave it alone for now.
  3. The "ISO file" location and name is set by default.  I would leave it alone as well.
  4. Click the "Scripts" tab (next to the "Paths" tab) again.
  5. On the left-hand side next to "VistaPE" project, you will see the project elements listed in detail. Each of these also has a "+" you can select to expand if you find it helpful.

Fourth: Tweak to Perfection!

  1. Back on the "Scripts" area on the right-hand side, in earlier versions you would see two small and blue arrows (forward and back) separated by a light line.  These allowed us to step through the project elements and "tweak" the build. Those are gone now in version 011.  We must manually step through the elements.
  2. On the left-hand side, select the "Main Configuration" item.  For the most part, I leave the options alone with the following exceptions:
    1. I like to set the screen resolution to "1024x768", but you can leave it at "800x600" for compatibility with other monitors if you like.
    2. I like to set the "Main Shell" to "BS Explorer" as it mimics a Windows Classic theme a bit more.  If not, just leave the "LiteStep" set as it is.
  3. Let's leave the "Extended Configuration" settings, as-is.
  4. On the left-hand side, Click the little "+" next to the "Build" folder.
  5. Notice we are now in the "0 - PreConfig" sub-element area of the project.
    • If you are using the WAIK, you should see the path listed. If you are using a Vista disk, it's program files path should be showing.
    • I always set the "boot.wim" container setting to "1"  I think this is puling the 1st image stored in the boot.wim file.  I have had good success with using "1" but if things don't work for you, try using "2" instead.
    • Leave the "install.wim" container value set on "1".
  6. Select the "1 - Copy Files" sub element.
  7. We are now in the "1 - Copy Files" sub-element.
    • If you are not using a Vista DVD, then uncheck the "Same recovery tools" checkbox. It won't hurt if you leave it checked but are using the WAIK, but doesn't hurt either to remove it if you don't.
    • Notice the "Copy Custom Folder" checkbox.  If you make a "\Custom\VistaPE" subdirectory in your C:\VistaPE_WinBuilder_011 folder, then any files\folders added manually by you into this location will be added to the root of the media disk you are building.  This is REALLY awesome as it lets you place additional 32-bit applications (most "standalone\portable" applications work great) on the disk for use.
    • If you did download the GImageX utility earlier, go ahead and make the "C:\VistaPE_WinBuilder_011\Custom\VistaPE" subfolders and place the unpacked file (gimagex.exe from the x86 folder version) in there.  If not, no biggie...
    • Also copy the imagex.exe executable and the wimgapi.dll file into it from the C:\Program Files\Windows AIK\Tools\x86\imagex.exe location.
    • Leaving the "Clearing Target Folder" checked forces WinBuilder to empty the build-location folder it uses to create the disk, before it starts the build process.  I generally leave it checked, but it does add extra time in building if you uncheck it.  So let's leave it checked for now.
  8. Select the "2 - New Hives for VistaPE" item.
  9. We are now in the "2 - New Hives for VistaPE" sub-element.
    • Just leave "Clean custom registry files" checked.
  10. Select the "3 - Shell & Config" item.
  11. We are now in the "3 - Shell & Config" sub-element.
    • First we have a drop-down to set the FBWF value.  I must confess, I didn't know what the heck this was at first.  It is the "File-Based Write Filter" which allows PE "...to maintain the appearance of read and write access to write sensitive or read only storage. FBWF makes read and write access transparent to applications."
    • I just left it at the default "64" setting. Once you get used to building, you can fiddle with higher values.  64 seems to work fine for my tests on various systems.
    • Leave the "delete work folder' checked.
  12. Select the other folder elements and click the little "+" arrows to expand...repeat as needed.
    • Now you will jump down into "Apps" elements (and others) and can set custom options for these as you advance through them.  I would just leave everything set as-is for now.  They are generally very self-explanatory.  Add and remove project script applications as you see fit.  For now why don't you just leave them set to the defaults.
  13. Select the 2nd "Finalize" folder and click the "+" next to it.
    • Click the "7 - Create ISO" item and then click the check-box to enable this feature.
  14. We are now in the "7 - Create ISO" sub-element.
    • If you wish, you can give your volume name a different name.
    • Let's leave the "Show mkISOfs window" and "Compatible mode" boxes checked.
  15. If you really like the build, go back to the "Main Configuration" line at the top and select.  Then click the "Save button at the bottom, center of the window to save your configuration settings.  Good habit to get into!

We should now be all set.  If you want to go back and check something in your project configuration, you can just click on the specific element on the left-hand side tree structure...just be careful to not accidentally uncheck something.

Fifth: Fire the Crap out of it!

All ready?  Good!

We are about to process all the pieces to make our masterpiece!

  1. Click the BIG blue arrow "Play" at the top-right of the WinBuilder window.
  2. WinBuilder will start to process the build.
    • If you are prompted to install a driver, click "OK".  This allows WinBuilder load the ImageX filter driver used to mount the WIM (Windows Image File) and make changes to the base one shipped with the WAIK or Vista DVD). I haven't seen this appear in using version 011.
    • If something errors out, that (usually) doesn't prevent the build process from completing, just that element may fail to work.
    • Depending on the addition of extra files you want added, the copy files process may take a bit.
    • You will see a nice progress meter for each stage of the process.  If additional programs are needed, it will attempt to go and fetch them.
    • For the "6 - Finalizing" stage, you may see a "boot.wim" window appear..
  3. If all is well, you should see a DOS window for mkISOfs pop up and it will show the progress of rolling up the ISO file.  Depending on your system's CPU, RAM and drive-speed, as well as how many (if any) custom files you added, this might take a moment, but should be relatively quick. On my system it takes about 5 minutes or less for a "Recommended" build.
  4. When done you will be back to WinBuilder with the "Log" window displayed.
  5. I sometimes have a few "errors" as I noted where the builder was actually looking for associated Vista DVD files that don't exist when you use the WAIK as the building source.  No big deal. You can explore this window if you want.  As you get used to things, you will discover what scripts call to the Vista DVD and can disable them (uncheck them) if you are using just the WAIK as your build source.

Playtime!

At this stage you can go into the ISO folder of your WinBuilder location and find the ISO file.

The "Recommended" build ISO with only a few extra files (gimagx and imagex) comes in at just over 144 MB in size.  The "Complete" builds come in at over 386 MB in ISO size.

To play with it you can burn the ISO to disk, using your favorite ISO burning tool.  Mine is BurnCDCC for it's simplicity.  Then in a system that has the BIOS set to boot from CD first, pop in the disk and boot the system.

I prefer to first test my boot-images using Virtual PC first to avoid making coasters.

From what I understand, you really need to set your virtual machine at 512 MB system RAM.  Lower than that and the WinPE 2.0 environment gets kinda cranky.  Go too low and it won't boot.  Seems to apply this way in "real-life" system booting as as well.

WinBuilder does allow you the options (under the second "Finalize" element) to burn the ISO directly to a cd when done as well as run the ISO in a VirtualBox session automatically.  You do have to have VirtualBox (freeware) installed on your system prior to doing the build with this option selected, however. WinBuilder provides you a link to the site or you can get it here.

If all went well, you should see a GRUB4DOS boot loader with the slick new blue-wallpaper background.  Very nice! You can select the default (VistaPE) or one of several other options.  This really comes into play in the advanced and beta build projects.  For some of them you can also install MemTestx86, other Windows boot options, as well as Linux "livecd" builds.  It is really amazing.

You may also see a Vista'ish logo appear in the "Complete" build version; again a very nice and professional touch.

When the default configuration comes up, you should see command-line box with the Win PE 2.0 doing some initial PE 2.0 work.  It's turning on some services and starting a network connection.

Then (again depending on the build options you selected) you might see the PE Shell Swapper window come up that will allow you (briefly) to select a different shell as well as screen resolution if you wish to deviate from the defaults.  Just wait for it to tick down or hit the "Go" button.  If you set a particular shell as your default (like I suggested doing with BS Explorer) then it should just load to the desktop with that shell.

If you did select BS Explorer, you will have a task-bar, the familiar Windows Classic "Start" button, and various application icons on the desktop.

So what can you do?  A lot!  Click on the Start menu and get playing (carefully as there could be a lot of high-powered tools here).   

I wanted to cover the basic (easy) approach first as it was a quick and easy way to get familiar with the VistaPE WinBuilder program and process.

Advanced Techniques

If this worked successfully for you and you are comfortable, try selecting the VistaPE Project again but going into all the detail sub-project elements and selecting them ALL or even maybe the VistaPE MulitBoot at "Complete" setting for your second attempt.

Then expand and go into the details "+" sub-project elements and click-away to your heart's content adding additional tools, recovery options, applications, office applications, browsers...etc.  Add and remove depending on your needs and what size you want your final ISO/CD/DVD-media size to come in at.

There are so many options and possibilities, it is simply amazing. 

Once you have picked all the elements you want to add, and have everything checked off (tip: by default some sub-element items are not checked, even though the upper box is, to select all at once, uncheck the higher element then re-check it.  The container objects underneath should all be checked now). 

If you are doing the VistaPE MulitBoot (Beta) project, pay special attention in deciding if you want the "VirtualTest", "Slax Linux," and "OtherOS" options checked.  That will greatly increase the download/build time as well as space required to build. 

Make sure you have sufficient quantities of both!  And forget about doing it without a broadband connection to the net!

Then follow the steps again to "Download" the script elements first.

Finally, when the downloads are done, go back to the "Scripts" and walk through all the options again and adjust accordingly.  It will take much longer this time but the steps I've outlined should be pretty-much the same.  Hit the "Play" button when you think you have it all set up the way you want and let the building begin.

At first it may be a bit confusing for the uninitiated in selecting your build project (VistaPE or the Vista PE Beta) and then selecting the default/additional script sub-project items and individual elements/programs for inclusion.  I don't really feel I have done as good as I job as I would like explaining that part, but take a while to play with it and select down through the sub-project elements and you should see what I mean.  You will pick it up quickly after the first couple of project builds you create. 

Then you can begin selecting other project servers and looking at the additional projects they offer as well.

Gallery Ready: A VistaPE Complete Build

VistaPE_Grub4Dos

GRUB4DOS - Pick a Boot mode!

VistaPE_PreBoot

Starting Windows Vista (WinPE 2.0)

VistaPE_Splash

My, what a pretty Vista splash Screen, you have VistaPE!

VistaPE_v011_Complete

All dressed up and places to go: tools, utilities, browser, and much much more!

Back to that "Everyone" Security Thing

Call me an alarmist, but I just don't feel comfortable leaving a folder/zone on my drive with the "Everyone" account on it and full rights.

Looks like a playground full of mischief waiting to happen.

What I do is this: Once I have completed my VistaPE building activity for the day, I go back to the folder, right-click and select "Properties" then the Security tab.  I select the Everyone account group I made, then go to the window below and unclick all the "Allow" checkboxes. 

When I apply the change this effectively removes the "Everyone" account.

Next time I need to do more building, I go in and recreate it with the rights and do my building again.

There are other ways (setting the items in the account to "deny" or deleting the account at the top, but I just personally like this technique.

Were any malware or other baddies get on my system, it would prevent them from using this folder as a launching ground for rouge behavior.  It's not perfect, but is better than leaving it there.

Final Thoughts: Refined and Rehashed

As in my original post, these thoughts remain unchanged.

WinBuilder VistaPE and BartPE are very similar in that you need to have some base Windows files to build the PE environments...with BartPE you have to have the XP setup disk and WinBuilder VistaPE does not require a Vista setup disk if you have the WAIK instead.  They both are based on scripts, but with BartPE, you must manually download the "plugins" into a plugin folder then download and configure (if needed) many of the actual applications you want to add.  WinBuilder VistaPE allows you to select the scripts/applications you want, then goes and downloads/and installs them for you automatically.

BartPE requires you to adhere to Microsoft's more restrictive PE 1.0 licensing requirements for usage.  Win PE 2.0 is free and open for all...no version of Vista setup disk is technically required to build these disks.  No limits on how many you may create or have in use at any given time.

BartPE does allow you to "slipstream" XP SP-2 in the build process if you only have a XP or XP SP-1 setup disk.  This is a nice feature.  Vista doesn't have SP-1 released quite yet (maybe later this week?) and I don't know what real value it could add to the Win PE 2.0 environment.  However, I am sure the VistaPE WinBuilder team will be taking this into consideration if they feel it is warranted, but I really don't think it will be (at this stage at least).

I love and will continue to use BartPE disks, but VistaPE will likely be an integral part of my CD-case from now on as well.  Especially now with the release of the slick version 011 release.

Props to NightMan and his team of contributors who have really done an outstanding job with this project.  I can only dream of the direction future versions can take.

Here are some more WinBuilder help website pages that might be of help:

WinBuilder Help Manual

WinBuilder Start Guide

VistaPE - Configuration

I've tried to be as accurate as possible in my post.  If you find something incorrect or radically different, please let me know.  I hope that this encourages others to play with this powerful PE 2.0 building tool of NightMan's.

Best Wishes!

--Claus

Cures for Late-night Boredom

For some reason, I was very restless last night.

Couldn't go to bed.

So I stayed up a bit later than usual on the Webs.

Way past when all the folks who feed my RSS feed blogs went to bed.

It was quiet.

So I had to get off my usual well-worn paths and strike out.

So I ended up stumbling in and out of the late night Web-bars.

Figures on Stage

Blogger Play - (streaming photo website) - Blogger Play is a very clever website that appeals to the web voyeur in us all.  It is simple. It is pure and it is captivating.  Blogger collects all the images that are being uploaded to their Blogger Blogs and streams them against a zen-like black interface.  No captions, no words.  Just a stream of images.  I never ran into any NSFW images, but I suppose it could be possible.  I assume that Google is doing some filtering using their image-search filter algo's.  

I found that if I set the speed down just a tad, I started making up stories to go along with them. Growing up, dad was a (very good) amateur photographer and captured 90% of his photography work in slide format.  We kids and the parent's social friends would often get treated to the slide-projector carousel's "ca-chunk" for slide-shows that might feature family, nature, or cultural perspectives (pictures of Vietnam taken during dad's tour overseas there).

So with my mind semi-numb from fatigue, I caught myself staring at the random stream of images; here we were at the diner.  There was this cool lizard there.  There was grandma at her party.  That's Marge's favorite fashion bag.  This is the dam we drove over.  Stuff like that.

Dinosaur comics - (webcomic) - No clue how I ended up here.  Oh, yes.  Via rogueclassicism. Anyway.  It appears the format of this six-panel comic strip never changes.  The frames are always the same.  However the content is pretty clever and (at times) filled with biting satire or social commentary.  Sometimes the strip bombs bad. Other times it really strikes a nerve.  Sample strips: unpopular life goals, t-rex: bread, i should get some friggin' groceries!, i will call it, "sherlock holmes and the case of the mummy's curse!"

Created by the mad-genius: Ryan North.

Vera Brosgol's VeraBee - (graphic artist page) - Jumped here from Ryan's link page. According to Vera's bio, she came to the States from Russia and got into the animation and art scene.  Lots of good work here.  I really like the bold retro-feel of her pieces.  Flirty and full of emotion, but never vulgar or trite.  Good stuff!

Jim's FAIL Bar

Jim Thompson's recent blog-post "FAIL." really seems to (sorry about this) really hit it on the head.  Here I am stressed out a bit about this big project I'm leading (but not in control of) and struggling with feelings of inadequacy and failure.  Then he comes along and shows me there are a lot more losers and fail'ers than I have realized.   Puts the whole thing into perspective, in a Good Way™.

Anyway, his post links to the site The FAIL Blog which has great photos of event-failures with cheesy "FAIL" captions.  Kinda like I Can Has Cheezburger? but without as many cats.

That led me to the DOING IT WRONG blog and the Shipment of Fail. Two more sites that show failure on the grand and humorous-scale.

By-far cheaper than a therapist for folks with failure-issues.

YouTube Tavern

YouTube - Mindstorms Autofabrik - Dude(s) built an automated Lego-car factory using the Mindstorms components.  Really slow-paced seven-minute production (will put your cat to sleep) but very cool for Lego fans. At least once.

YouTube - Lego Millenium Falcon Stop Motion - Dudes use stop-motion to film the building of a Lego Star Wars ship.  Not very clever in-of-itself.  However, catch all the details in how the pieces are handled as the come in for placement on the project.  Lots of little gems make the whole a fun video.

I'm a big fan of the web-comic MegaTokyo.  So imagine my surprise in finding some fan-made animations of the MegaTokyo gang.

YouTube - "Megatokyo: The Animation" Trailer Version 1 - Not a bad summary of what MegaTokyo is all about.

YouTube - Largovision - Fun video animation production of the world from Largo's viewpoint.  Wouldn't have been nearly as good without the l33t soundtrack from Therion.  Got to go get me the album on iTunes if available.

(More on Therion: Therion (band) - Wikipedia, the free encyclopedia)

Metal, classical themes, and choirs.  What's not to like? Don't get it?  Maybe this will help; they are Sweeds.  Enough said.

The Geek Diner

After checking out the cool Therion tattoo I drew on myself at 2 am, I figured I better start to come down from the site-hopping and drop into the geek diner for some Joe to settle me down.

DemoGirl - DemoGirl is Molly McDonald.  She has figured out the cleverness of using screencasts to "demo" products and techniques related to technology and computing; others have done this already, but she does it pretty well.  Nothing 'earthshattering" but the screencasts are short and concise and do seem to provide a good overview of the topic at hand.  Samples: Tour of Firefox 3 Beta 2, Beautify your Firefox with Personas, Thoof - Cool service, but I don’t get your name.

Au | Geekdad from Wired.com - Neat photo of actual gold atoms.  How cool is that?  I remember being in high-school and seeing some fuzzy nebula-looking pictures that were supposedly the first images from the atomic level.  I thought, "so what?"  Now, I think "How cool is that!"

Related: The Sietch Blog » Wanna See What Gold Atoms Look Like?

At this point of the night, everything seems to be taking on a weird glow.  My eyes are failing me.

Oh!   Never-mind.  I'm on HDRwalls.com  This website has quality High Dynamic Range wallpapers for Macs, Windows, and mobile devices. With almost 500 images, it really introduces you into the beauty of the HDR styled images.  Good stuff.  What's cool is that if you find one you like, you can select the screen size (from mega-monitor down to mobile-phone screen size) and download it.

Repent! The Morning Comes

So now it is Sunday.  I better clean up my late-night wanderings.

Time to go to church: The Brick Testament

Some may find it irreverent, but it does have a message that cannot be overlooked.

I feel better.

Time for bed, little mouse.

--Claus

Saturday, February 02, 2008

New and Improved: Software Roundup - Grab a Plate!

Boy-howdy.

I've been swamped at work on my new project.  I'm regularly putting in 12-hour days now as well as doing fill-in work at home on the weekends...just to get it all done.

That has been leaving me scant time for blog-posts. (The Valca girls expect some "Dad/Husband" time as well, not to mention the daily chores, cooking, and real-world things that still need to be addressed.)

Whew!

Nevertheless, I still try to log on and sort through my 100 or so odd RSS feeds daily.

In this regard, I have been building up a good collection of new and improved (freeware) software finds, but haven't been able to post.

Until now.

The buffet is open, gorge to your hard-drive's content!

NirSoft Nuggets of Note

Where would we be without Nir Sofer?

OpenWithView - (freeware) - "...a small utility that displays the list of all available applications in the 'Open With' dialog-box of Windows, and allows you to easily disable/enable the applications in the list. When application is disabled, it won't be displayed in the 'Other Programs' section of the 'Open With' dialog-box. This utility can be useful if your 'Open With' window displays too much applications, and you want to remove the applications that you don't use frequently."

I really like this one in that you can "disable" the items you don't want to see, but later go back and re-enable them if you make a mistake or find you need something later.  Supports XP, 2003 Server, and Vista.  No installation needed; unzip and use.

CurrPorts - (freeware) - Updated version 1.32 - "...displays the list of all currently opened TCP/IP and UDP ports on your local computer. For each port in the list, information about the process that opened the port is also displayed, including the process name, full path of the process, version information of the process (product name, file description, and so on), the time that the process was created, and the user that created it. In addition, CurrPorts allows you to close unwanted TCP connections, kill the process that opened the ports, and save the TCP/UDP ports information to HTML file , XML file, or to tab-delimited text file. CurrPorts also automatically mark with pink color suspicious TCP/UDP ports owned by unidentified applications (Applications without version information and icons)."

Supports XP, 2003 Server, and Vista.  No installation needed; unzip and use.

This new version allows you to start the application as "hidden" as well as being able to copy the remote IP address.  Related freeware tools:  VStat by Robin Keir and TCPView from Microsoft Sysinternals.

USBDeview - (freeware) - Updated version 1.15 - "...USBDeview is a small utility that lists all USB devices that currently connected to your computer, as well as all USB devices that you previously used.  For each USB device, extended information is displayed: Device name/description, device type, serial number (for mass storage devices), the date/time that device was added, VendorID, ProductID, and more... USBDeview also allows you to uninstall USB devices that you previously used, and disconnect USB devices that are currently connected to your computer."

Supports XP, 2003 Server, and Vista.  No installation needed; unzip and use.

This new version update allows you to enable/disable USB devices.  Handy if you are a sysadmin and don't use Active Directory, but want to lock down a user's use of an unauthorized USB device they keep attaching to their system.  Also helpful, it records and displays the serial number (if available) of the USB device being attached.  Neat if you have to go back and prove it was the user doing it.

Net Tools 2008 - Pure Red Meat

Back when I was a kid and buffet style dining seemed new, I noticed that while customers were allowed to plate up all the salad, veggies, and desserts they wished, there was always the restaurant employee stuck with carving up the roast-beef and doling out the tiny portions.

Mohammad Ahmadi Bidakhvidi has really decided that model for software isn't a good thing.  He has placed the roast-beef out for all to serve-up to their heart's content.

Net Tools - 2008 - (freeware) - Requires .NET.  This utility contains over 175 network and system utilities all rolled up into one.  It bundles network scanning, security, file tools, system tools, and administrator tools.  Configure to your heart's content.

Must be installed on your system...so it's not really "portable" but it has so many useful tools, I can't imagine not using it.

See the link for the full list of included tools.  Below is just an "au-jou" sample of the tools that caught my eye to wet your appetite:

IP Address Scanner, IP Converter, Port Scanner, Trace Route (2 ways), Connection Analysator and protector, Spoofer, Mass Website Visiter, Trojan Hunter (Multi IP), Simple Anonymous E-mailer, E-mail Spoofer, File Dependency Sniffer, Encrypter,  File Difference Engine, Mass File Renamer, Password Unmasker, Web Server Scanner, Advanced Packet Sniffer, Bandwidth Monitor, API Spy, Advanced System Information, CPU Monitor, Widows Startup Manager, Process Checker, Connection Manager / Monitor, Force Application Termination (against Viruses and Spyware), Easy and Fast Screenshot Maker (also Web Hex Color Picker), Create Virtual Drives, Sniffer.NET, File Shredder, Steganographer (Art of hiding secret data in pictures), Subnet Calculator, Get Remote MAC Address, Cookies Analyser, Packet Generator, Secure File Splitting, Hide Drive, Software Uninstaller, Tweak & Clean XP, FreeMAC (MAC Address Editor), Network Protocol Analyzer, GeoLocate IP, Remote LAN PC Lister, Network Traffic Analysis, Network Traffic Visualiser, Advanced System Hardware Info, Live System Information, Network Profiler.

Spybot Search and Destroy - 1.5.2

The macaroni-and cheese of anti-malware products.  Tastes good and is comfort food.

Spybot-S&D 1.5.2 - (freeware) - I've been working with the Spybot betas for this release for some time and found they take care of a number of nagging issues (slow launch times, problems with Firefox support, etc.).  So it is with great pleasure I saw that version 1.5.2 of Spybot was released this past week in final-form.

Go load it up!

See the change list for the full list of goodies. But here are some highlights:

System support

    * Fixed HyperThreading issues
    * Improved 64 bit immunization
    * Create Portable.ini in main folder to use app folder as data folder as well
    * Support for multi-line bookmarks (IE 7 / Vista)
    * New Immunization for Firefox & Mozilla
    * Improved Immunization for Opera

Misc

    * Updater now in separate executable file
    * Improved disabling/enabling BHOs
    * New special error reporting for beta versions
    * Fixed update-related crashes on Vista
    * Fixed memory leaks (replaced Indy with Synapse)
    * Vista-compatible MSI installer for those who like/need that    

Detection and removal of threats

    * Improved PE detection all over the place
     * Improved file removal methods
     * Added support for renaming services before stopping/killing/deleting them
     * Much improved logic connections between files, registry and API detections
    * File version checking
    * Improved archives checking
     * Improved Sys Internals file location algo
    * Improved hosts file location algo

User interface changes

    * Improved localization of list of updates
    * Added Firefox icon on Cookie exclude page
    * Fixed cookie removal selection problems
    * New confirmation dialog for system restore points
    * Process list now is a bit less eager on tooltips
    * Improved "delay start" dialogs
    * Now displays checksum for each result for better trackback of results
    * Fixed "Ignore Products" column width problems on Vista
    * Improved SDHelper dialogs and block/allow choices

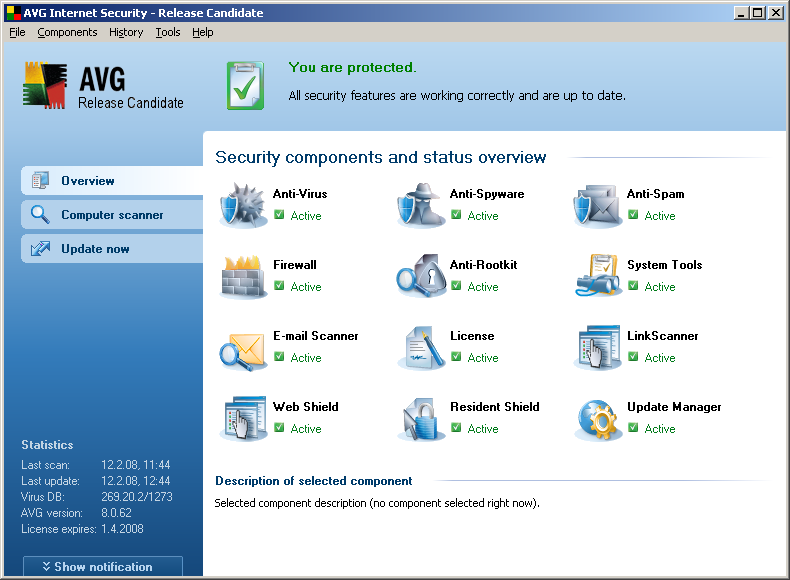
AVG 8 - Public Beta Available

Grisoft, makers of my favorite free anti-virus solution, Grisoft AVG Free, are working on a major update to their a/v product.  Public beta for AVG 8 - heise Security

The interface is much more polished and professional looking now.  I am finding navigation to be much more intuitive than in the current version 7.

You can download and install it from a number of sources.

The "official" download from AGV is here.  It requires registration (easy) as a beta-tester.  I went ahead and did so.  Unlike most beta-sites, Grisoft allows its registered beta testers to take well-designed surveys to provide testing and usage feedback.  So you really can play an active role in providing feedback on beta products.  Some other software makers offer beta-versions but make it difficult for feedback.  Kinda like they want to create "buzz" on a tool, but don't really want to hear what you have to say.

If you just want to get going with the product and pass up all this beta-registration stuff, I would recommend getting the file from FileForum | AVG Anti-Virus Professional 8.0.52a1239 Beta as your source.  The download is much faster and no registration is required.

Note:  This version is the "suite" package and includes anti-virus, anti-spyware, anti-spam, a firewall product, anti-rootkit, email scanner, a web-shield and a resident-shield protection.  Install on your "live" production system knowing you will have to remove like features you may have already installed by other vendors or disable the ones in the beta version.

I just installed in in a Virtual PC session of XP for my testing.

ZIP IT!

File compression tools are like the salad at a buffet.  They seem to be a dime-a-dozen.  Everyone has one and while you can add all the "extras" you want, they seem all pretty much the same.

The other day, I noticed that a new version of 7-Zip (4.57) was released.  I really like 7-Zip as a file compression tool, but the interface is just really awkward to use.  No matter how hard I try, I keep making mistakes using it to create new archives.

So while poking around the site, I noticed a tiny box touting a new 7-Zip based utility: jZIP.

jZip - (freeware) - jZip combines all the power and flexibility of 7-Zip into a well designed and intuitive interface.  It is very easy to use and work with.  Fully free for home and enterprise users.  Supports Zip, TAR, GZip, and 7-Zip compression formats.  Can also unpack all the formats 7-Zip can handle: RAR, CAB, ISO, ARJ, LZH, CHM, MSI, WIM, Z, CPIO, RPM, DEB and NSIS.

PeaZip - (freeware) - I have also carried this utility on my USB stick for while.  Comes in both Windows and Linux versions. You can create archives in the following formats: 7Z, ARC, BZ2, GZ, PAQ/LPAQ, PEA, QUAD, TAR, UPX, ZIP; you can open the following formats: ACE, ARJ, CAB, DEB, ISO, LHA, RAR, RPM, and more...

Other freeware favorites of mine include:

  • ZipGenius.it - Why pay for WinZIP?  This is all you really need.  Integrates beautifully with the OS.
  • FreeCommander's built-in compression tool.  I use this 90% of the time.
  • Universal Extractor - Opens just about everything compressed.
  • TUGZip - Very nice and clean interface.
  • ALZip - Cute interface.  More "nooby-friendly"

Doug Knox - No Blox!

Doug Knox has a number of really clever and handy XP utilities on his website.

In looking through them all, I found his XP Security Console tool - (freeware/$).

This no-install utility allows you to make various changes and tweaks to your XP Home system. Many of them are security-permission related.  If you really need to drop-down and control end-user permissions on your XP Home system, this might be the tool you want.

The $ (registered) version allows for some additional features, as well as making changes across user accounts without having to log into the target account first to use the tool on it.  You can also set "disallowed applications" in the registered version.

WinPatrol 2007 - Now with extra seasoning!

WinPatrol 2007 - (free/$ versions) - I know a LOT of folks who really swear by the protections that WinPatrol provides in the battle against malware.  It can detect and manage auto-start programs, monitor BHO's and toolbars, monitor scheduled tasks, kill running tasks, monitor and control services, manage cookies, monitor browser home pages, edit the HOSTS file, detect changes to file associations, detect and view hidden files, selectively delay auto-start launchings.  Besides the utility functions, it works well as a heuristic monitor for attack monitoring and behavior monitoring on your pc.  Threats are found and alerts provided with clear descriptions.

I already have enough other malware-threat security layer applications on my system, so I don't personally use WinPatrol, but I have seen it in action and am very impressed and can highly recommend it.

I mention it here, because the developer, Bill Pytlovany, has just added a new feature to it; keylogging detection.  While present before, detection and removal has now been activated in the free version also.

Keyloggers attempt to intercept and record key-stokes. By doing so, a hacker can recover passwords, text, and other input a user might do, and get a frightening insight into your computer activity.

Many anti-malware and anti-virus programs also will detect and remove them, but it is nice to see that Bill has recognized the threat and warmly decided to include this feature into the free version of his stellar product.

bCheck's Apps

This is so tiny and specific a utility, I'm not sure it will appeal to most users.  But if you need to accomplish a very specific task, it's the ticket!

DevMgr - (freeware) - Download and run.  It allows you to make a shortcut to launch the "Properties" window of any device found in the Windows Device Manager.

So if you are constantly having to enable/disable a device or change the settings, this is a great way to make a direct shortcut, rather than navigating to it the long way.

NewsFox RSS Reader Add-on for Firefox

Yep.  I'm still touting the wonders of NewsFox for Firefox.

Reminds me of the yummy goodness of fresh-baked buffet rolls.

New tip:  If you dislike the pop-up window view that appears when you move your cursor over a feed in the list, just drop into about:config

Type "about:config" in the address bar and enter.

In the filter bar, type newsfox to filter the list.

Find the key newsfox.advanced.articleTooltip and set the value to "false".

Now you won't see the pop-up preview windows when you browse your list.

Also, I highly recommend you go and snag the latest beta version for NewsFox:

Firefox NEXT (0.8.4rc1) - This version seems much faster at feed discovery and incorporates many of the "hacks" I have mentioned directly into the GUI interface for options.  I've had some issues with directly clicking the link offered and installing the xpi file.  So I right-click the file, download (save) to my desktop, then drag it into my open "Add-ons" window in Firefox to install it.

Once installed, it works wonderfully.  I'm really pleased with this new version, even though it is beta.

SUMo - Buffet Management

SUMo - (freeware) - This tool allows you to quickly scan your system and see any of your applications (installed or not) have newer versions available.  While Secunia Personal Software Inspector RC-1 focuses only on products that have security vulnerabilities, this tool just focuses on newer versions.

It runs very fast and does a pretty good job of finding software on your system.

First download and "install" the program.  Next click the "Scan" button to scan your computer for the files it recognizes. Once done, click the "Check" to see which programs have newer versions.

It did a very good job on mine.

However, a few "gripes".  Many of the "newer" versions it offered ended up actually being "beta" versions.  I don't know the wisdom of offering "beta" versions for an update over a final stable release that is a lower version.  Kinda dangerous.

If it does find an update, the "Get Update" button looks helpful, however it only takes you to a website where you can do a search for the application, not to the direct software maker's page.  I found it easier to just Google for the programs listed needing an update.  That way I could tell if it was actually a beta product and go to the main program developer's page for the download.

Overall, however, it is a great little program.  Very handy. 

See also CyberNet's review of SUMo: Ultimate Software Update Monitor?

For alternative software update checkers, see this GSD post: Maintaining Application Updates.

Defraggler Beta - Updated

While I now find myself using JkDefragGui or Auslogic's Disk Defrag as my primary drive defragging tools, I like to keep many others around, just for kicks.

One of those is Defraggler - (freeware).

The latest beta version (v 1.01.050) now adds faster stopping of defrag progress on very large files, support for pausing and resuming defragging, fixes a bug for some special files showing up that shouldn't, the system drive is now selected by default, some user interface tweaks, and minor bug-fixes.

Worth checking out as it is a clean and nicely designed defragging product.

Vista Recovery Disk - Free ISO Download!

If you took the time to read my post Windows PE 2.0 Free For Everyone (Almost), you would have seen at the bottom some links and tips on how to create your own WinPE 2.0 Recovery Disk for Vista.

However, if you don't want to do the work, and are a Vista user, I highly recommend you download and burn (RIGHT NOW) this Vista Recovery Disk ISO file.

Windows Vista Recovery Disc Download — The NeoSmart Files

This disk allows you to boot a Vista system and get the Vista Installation disk wizard.

While handy, it actually has a built-in "recovery-center" to allow you to recover your tanked Vista system via "automatic recovery", rolling-back to a system restore point, do a full PC backup, or access the command-line recovery console.

It also has a memory testing function.

Since word on the street is that Vista SP1 may be coming out in final release this week (Feb 4th?), it might not hurt to have this handy, just in case!

New Google Search Views

Official Google Blog: Introducing new search views - Official Google Blog

Google has been experimenting with some additional search-result views.  You may or may-not find them useful.

New views are:

Map View: Results are posted with flags on a Google Map so you can quickly view the event location directly from your search results. Sample View: olympics

Timeline View: Results listed, with an accompanying timeline chart at the top.  You can drill down to a particular block of time to view just those results. Sample View: Apollo Program

Info View: Not as dramatic, but still helpful.  Results appear as in a standard Google search, but now you have refinement links on the side for Dates, Measurements, Locations, Images. Sample View: Last Exile

Regardless, worth checking out if you are a Google fan.

Jump to this link then click the "Join this experiment" button for the "Alternate views for search results.  It sets a cookie to enable the feature in your web-browser.

Full Yet?

Push away from the table....

--Claus

Get the Security Tab in XP Home! For Free!

XP Home and XP Professional have a few differences.

Overall, I really haven't found a need for the extra features of XP Pro at home.

Except one glaring problem: File-level security management and user rights.

Security and File Permissions in XP

Being used to the "Security" tab for file and folder properties at work on our XP Pro and Windows 2000 systems, where they supplement user-account restrictions, I feel a bit lost at Home.

Back when I was working on trying to remove some pesky (and updated) Flash files, the files were locked down in the security settings, and it took some clever work to reset them enough where I could delete them.  It was a piece of cake in Windows 2000 and XP Pro. Flash9b.ocx and Flash9b.ocx File Deleting Goodness

So in a round of recent troubleshooting trying to get an otherwise wicked-good application to work on my XP systems, I found I needed to play around with the security rights on the files/folders.

On XP Pro I would just right-click the file/folder, select "Properties" then select the "Security" tab and could modify the rights to my hearts content.

As I previously discovered, XP Home required a bit more work, and none of the methods were particularly graceful.

  1. Drop into command-line mode and use the CALCS command to change the rights.

  2. Purchase the application File Security Manager - (trial/$) - "File Security Manager allows you set, view and modify NTFS access permissions in Windows XP Home like in Windows XP Professional. You can easily lock, deny or allow access to files, folders and drives, define advanced permissions."

  3. Purchase the application Permissions Manager - XPHome tools - (trial/$) - "Permissions Manager is a software supplies GUI to manage security settings of files and folders. This GUI is quite different than generic Windows security dialog. It allows creating predefined sets of access control entries (presets) and applying these presets to file system objects."

  4. Drop into Windows Safe Mode - (free) - Yep. It's that cheap and that easy. Just boot XP Home in Safe Mode (F8 at boot). Now the File Security Manager tab magically appears in it's full XP Professional glory and will allow you to make any advanced special file permission settings changes in it's full GUI glory.

So what was I to do on my XP Home system?

I needed to make frequent changes to the security settings but paying for the software options didn't seem worth it.  I could drop into Safe Mode or the CLI but that was a lot of work for the number of files and folders I was working with.

Were there other options I had missed?

Yep.

Method One: Easy but not so Elegant

Use the Shared Folder wizard as a workaround.

Go to Start > Run and type "SHRPUBW"

A menu appears, browse to the folder you wish to to set security permissions on, give it a share-name, click Next >

Click the "Customize share and folder permissions" radio-button and click "Custom".

In the "Customize Permissions" window you can add additional groups and/or users, then set the permissions associated.

Confirm through and your folder will have the permissions set.

Con: It's a drag to do this for lots of files.  Only works on folders (and their contents).  Once set, it is difficult to remove the "shared folder" setting on the folder.  I had to create a 2nd folder, copy the files into it, then delete the shared folder to clear its settings.

For a visual walkthrough see TweakHound - XP Home Permissions 1

See also: How to configure file sharing in Windows XP - Microsoft KB304040

Method Two: Wicked-cool and Awesome!

This is wild but it works great (on my XP Home system)!

Download and install the Windows NT SP4 Security Configuration Manager from Microsoft.

Yep.

That easy.  There's the "Security" tab restored to XP Home, just like in its big-brother, XP Pro.

I know what you are thinking...install an Windows NT feature into XP Home? Are you Crazy?

Yep.  But it works.

  1. Download the file linked above from Microsoft.

  2. Run the file, and allow it to extract to a folder of your choosing.

  3. Open the file and look at the contents.

  4. Find the file named "setup" or "setup.inf"

  5. Right-click it, select "Install"

  6. The installation will occur.

  7. Reboot the system when prompted.

Now when you right-click on a file/or folder and select "Properties" you will see the "Security" tab in all its wonderful goodness!  Add users and permissions, remove users and permissions, change permissions for users.  It's all there!

Warnings:  This should only be used by folks who are skilled and knowledgeable-enough to know and understand the dangers of mucking around with file security permissions.  Do the wrong thing and you can seriously make working on your system miserable if you assign incorrect security rights.

See also: Downloading and Using the Security Configuration Manager Tool - Microsoft KB245216.

Before trying this tip, I took the precaution of creating a system-restore point.

I didn't need to use it, but it was good to do.

Proceed only if you feel this is truly needed.

Now I can quickly, easily and comfortably modify and swap-around the security settings in XP Home, without paying any $, either. 

This could also be useful in locking down bad malware files on a XP Home system as well if you are having to do some high-level malware troubleshooting and cleaning.

Sweet!

--Claus

Darn it...

Back from my recent trip to Austin and I noticed that my Nokia cell phone (6102) had started making a "clicking noise" when I flipped it open and close.

Upon closer inspection I found that a crack had developed in the plastic that wraps the hinge.

The phone still works for now, but the hinge seems noticeably looser. 

With a hat-tip to to Jim Thompson, I feel FAIL coming on!

So I have been browsing Cingular AT&T Wireless's phone selection and reading the reviews for the past two weeks.

I think I may head over to the local store and do some hand's on work also.

Both of the girls have the Samsung Sync.  They seem to be very happy with it and I do like the slightly rubberized feel of the keypad.  However, Alvis has managed to bust her front-screen by tossing it in her purse loose.  Something got jostled and when it hit the screen, it cracked.   Phone still works, but she doesn't have the cute little display on the front anymore.  Both girls also got it (mostly for the cool factor) so they could listen to music on it.  However, after working hard to get their playlists copied over, I've never seen them using it to listen to music.  They have reverted back to their iPods.

I've checked and it appears the stock is still out on this model.

Samsung has a similar model, the A437, but the reviews I have found haven't been very positive.

I really like the Nokia's having had many in the past (in a good way), but I don't like their current designs.

Most of our team-members have Motorola RAZR's but the keypad feels very awkward to me and menu system is a bit unwieldy.  Fortunately, the BlackBerry I have for work is great.

I've almost decided against another flip-phone for now.  I'd like something a bit more durable.  And definitely no "sliders".

I'm considering the Samsung A727 which seems thin but has decent talk-time and a large screen.  I might even be able to use the girl's Samsung accessories we have already picked up with it, saving the additional (hidden) cost of re-accessorizing a new cell-phone model.

And, to make it worse, I can usually get a better deal from the on-line store than the local one.  That's great for the budget, but I hate waiting.

And I am so fed-up with these "rebate" promos.  Just take the price off the top at purchase.  AT&T seems to like this, as in many cases, if you use their rebate card in their store, you get an additional discount.  Thus they drive more purchases.  However, while I might buy some accessories, I usually pick those up with the phone, so getting the rebate card 3-4 weeks later is a lost cause as I don't have any other cell-phone needs at that later time.  So I have to go and find a store that it will work at as a debit/gift card.  (One of the previous AT&T rebate cards we got actually got rejected by a few stores, luckily we finally found that the grocery store took it fine....sheesh.)

So begins the hunt.

Darn it.

--Claus